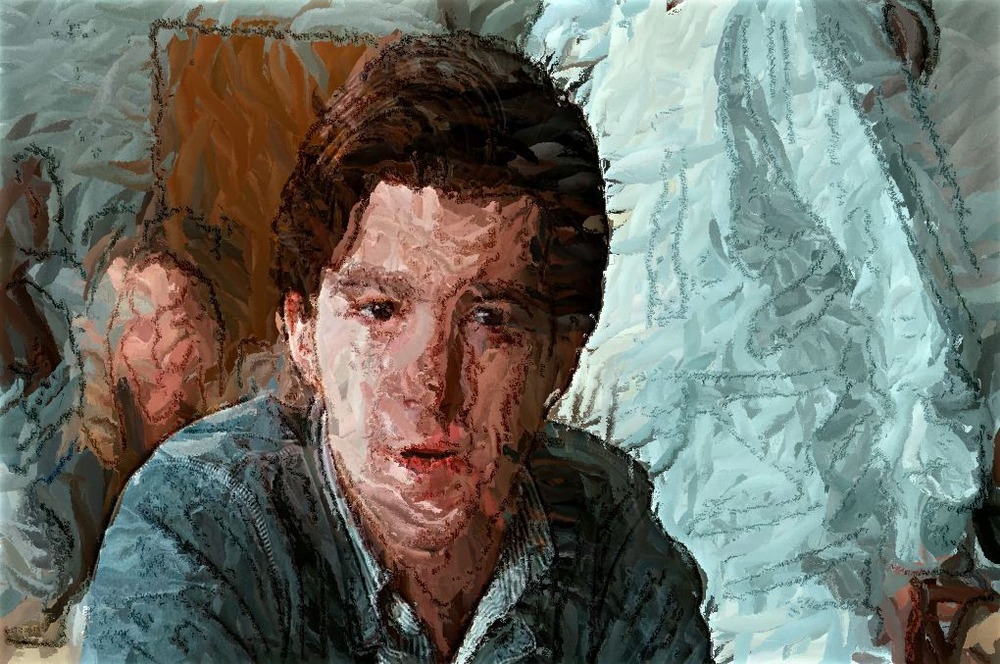
The following image is a frame capture from an auto-rotoscoped paint animation. I was trying to generate the look of a moving oil painting, inspired by some recent discussion on the Studio Artist User Forum about emulating Van Gogh styles using paint synthesizer auto-painting. While I don’t think i’ve totally achieved the van Gogh swirl style with this effect, it does work well for auto-rotoscoping a movie file into a moving oil painting animation effect that maintains a decent representation of the source movie facial details. This post will detail how I built the paint animation effect.
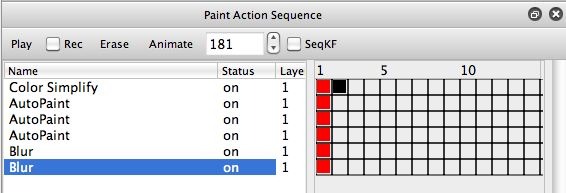
The paint action sequence (PASeq) below was used to generate the paint animation effect shown above.
Note that the first Color Simplify ip op action step is only run on the first frame of the animation (the black keyframe at frame 2 for this action step is a mute keyframe). The Color Simplify action step initially sets the canvas to a solid color region backing image. I did this as opposed to erasing the image to a solid color like white to avoid seeing any cracks in the paint coverage at the beginning of the animation. The paint steps used to build the animation don’t completely cover the entire canvas. This was done on purpose since having some of the previous canvas output show through for a subsequent frame output helps introduce some temporal continuity into the paint animation.
The 3 AutoPaint action steps build up the painting. They build representation like a real painter would do, starting with larger brush stroke sizing to rough in the painting followed by progressively smaller brush strokes that build edge detail.
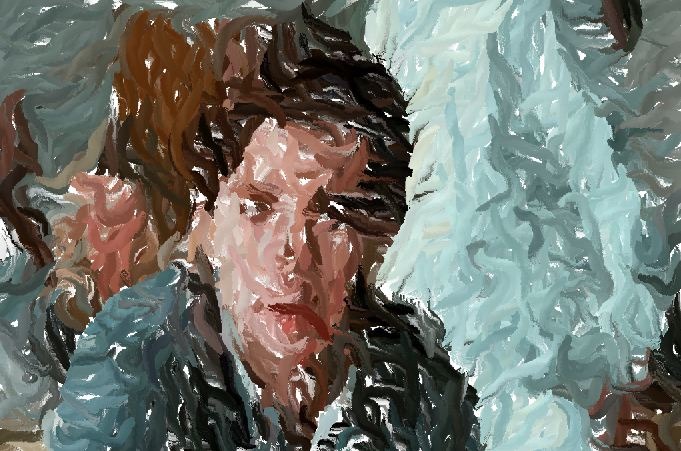
I was trying to achieve a Van Gogh swirl style for the paint stroke orientation in the first AutoPaint action step that roughs in the image with larger paint strokes. The first image in the gallery below shows the output of the first AutoPaint action step painted on top of a white canvas. Note that some of the white background shows through the cracks in the paint strokes as was discussed above.
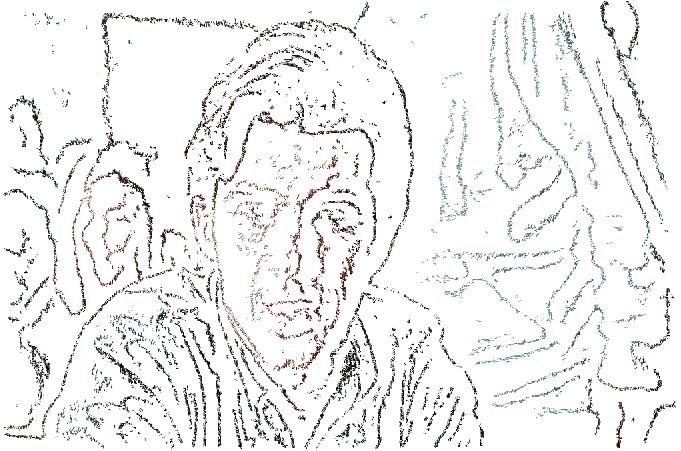
The second and third images in the gallery above show the output of the second and third AutoPaint action steps, again drawn on top of a white canvas so you can better get a sense of how they are drawn. These last 2 AutoPaint action steps use a progressively smaller brush size to draw the edge details in the source image. The gallery images are drawn on a white background so you can see what is going on, but in the real painting the 3 steps overlay each other and act to first rough in the current painted frame and then add detail to the painting.
The last 2 AutoPaint action steps are using the Edge Scan path start Generator option along with a Max Path Length of 1, so single brush nibs of paint are overlaid on top of an edge scan to paint in the source feature details.
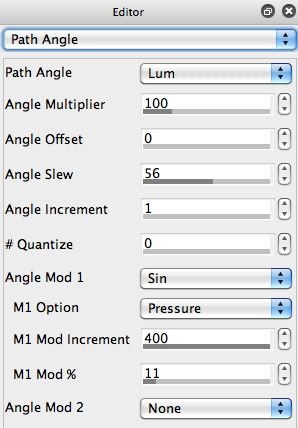
The first AutoPaint action step that roughs in the painting uses a Smooth Random path start Generator to distribute paint stokes evenly all over the canvas. I wanted to try and emulate Van Gogh’s approach to laying down individual paint strokes in a loose swirling style. To do this I used a Luminance setting for the Path Angle. I set the Angle Slew to a low value of 56 so that the paint stroke drawing would be very loose rather than tight. And I used a Sin option for the Angle Mod 1 parameter with a fairly long Mod Increment cycle and a small amount of Modulation % to make the paint strokes more swirly (by modulating the path angle with a long cycle sin wave).
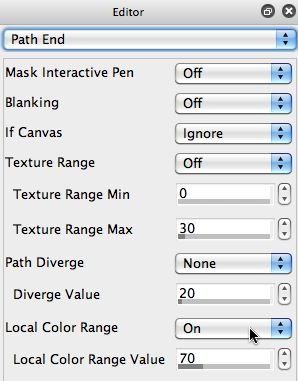
I turned on the Local Color Range control in the path end control panel to help tighten up the representational qualities of the painting. Turning this on insures that if a paint stroke of a specific color moves onto an area of the canvas that should be colored differently the stroke is ended at the color transition boundary. The Local Color Range Value is set to 70, so the color error needs to be above 70 before the path is ended.
The last 2 action steps in the PASeq used to generate this effect are using the Blur ip op configured to add some high frequency spatial detail from the source image into the finished painting. This is a trick you can use to help improve the realism of an abstracted paint style. A little bit of spatial frequency boosting goes a long ways, so don’t overdo this if you use it. The screen shot below hows the Editor settings used for the blur ip op sharpening effect, which use the Frequency Inversion option for the blur Type parameter. Note that the IP Source is set to the Source Image as opposed to the curren layer, so the source image is high pass filtered and then Add Scaled composited into the current layer painting.
The 2 Blur action steps use different Blur Amount parameter settings to add 2 different high frequency energy sharpening boosts to the painting.
You can watch the complete paint animation example described in this post here.




1 Comment