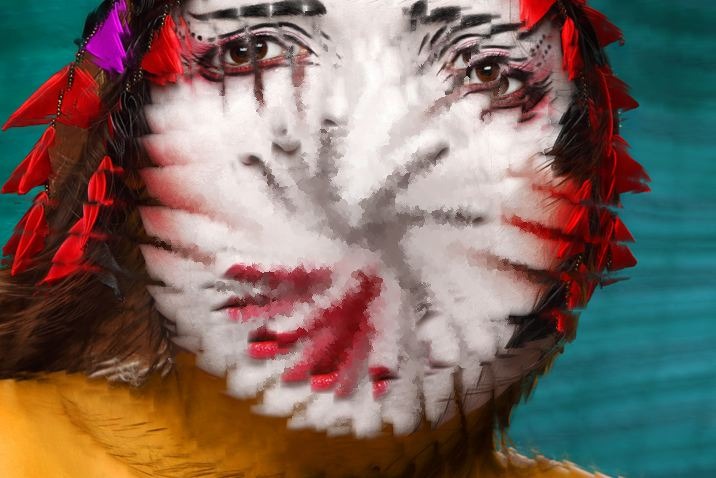
The following image is a frame capture from a simple animation that shows a source image shattering outwards. The effect was generated by using the time particle features of the paint synthesizer. This post will discuss how this simple animation effect was put together.
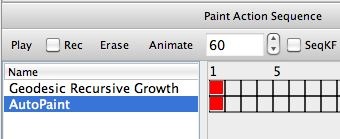
The simple paint action sequence (PASeq) below was used to create the image shatter animation effect.
Note that there are just 2 action steps in the PASeq. The Geodesic Recursive Growth ip op is used to introduce the feathering effect seen in the center of the image. The shattering source image movement is generated by using paint synthesizer time particles.
Note that the canvas is never erased. The existing canvas is feathered, and then the paint synthesizer overdraws on top of the feathered previous canvas output image.
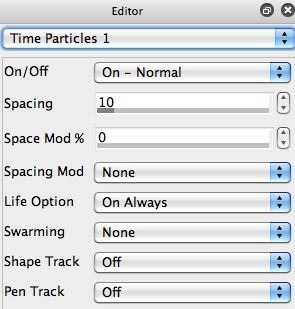
Time particles are a paint synthesizer feature that gives individual paint strokes continuity over time in an animation. Rather than being continuously regenerated from scratch in different frames of an animation, if time particles are turned on then individual paint strokes keep track of where they were located in a previous animation frame and have some form of movement over time in the animation.
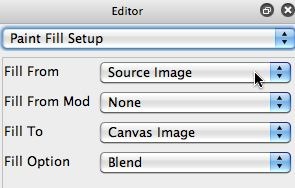
For this particular effect, the paint strokes are just composed of a single source brush nib. The paint preset is setup to clone the source image, as shown below. The Fill From control in the Paint Fill Setup control panel is set to fill from the Source Image. So the center of each brush nib is painted with the source image.
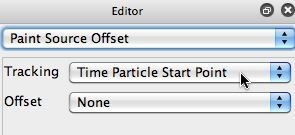
The Paint Source Offset control panel is shown in the second image in the gallery above. Note that rather than a normal Start Point setting for the Tracking, it is set to the Time Particle Start Point option. What this means is that individual time particles will always draw the part of the source image they were initially associated with. So this is the key to the shatter movement associated with the animation.
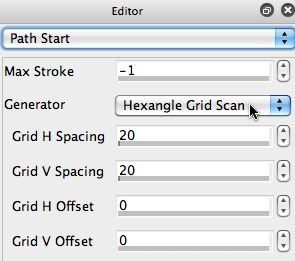
The paint preset initially draws in the entire image using a Hexangle Grid Scan option for the Path Start Generator (as shown in the 3rd image in the gallery above). So this fills the entire canvas with individual brush nibs painting the source image arranged to completely cover the canvas in a hexagon sampling grid. The subsequent time particle movement of these individual brush nibs over time in the animation as the brush nibs move outwards while still drawing the original source areas they were associated with when they drew the first animation frame is what generates the image shatter effect.
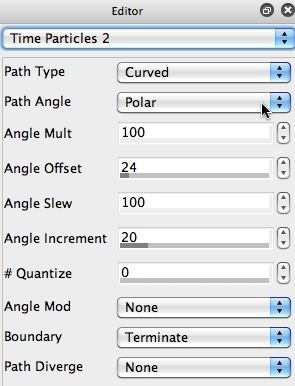
The time particle settings associated with the paint preset are shown in the 4th and 5th images in the gallery above. Note that time particles are turned on in the 4th control panel image. And the movement of the time particles is programed in the editor settings shown in the 5th control panel image. The Polar setting for the Path Angle with an Angle Offset of 24 is what gives the slowly spiraling outward movement to the individual time particles.
The animation was generated by opening an open movie stream, turning on the PASeq cycle write frame flag for the movie stream, and then running the PASeq in loop action for 60 cycles. The final animation is shown here.

