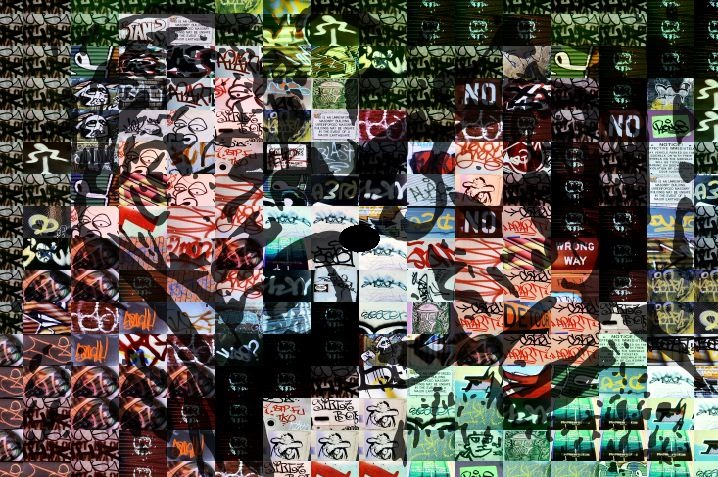
Adding some sort of representational component to an extreme abstracted image can often be a useful way to anchor the abstracted image back to it’s original source in the viewer’s mind. This post will show off how to use the Vectorizer Outline Technique to add source features into an abstracted canvas via an overlay.
The simple 2 step paint action sequence (PASeq) below was used to build the above effect.
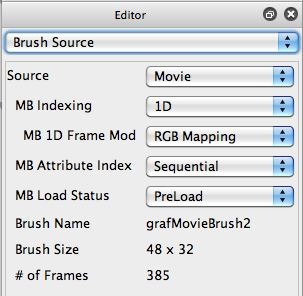
The first AutoPaint action step is using a graffiti movie brush to build a grid style photo mosaic image (as shown in the 2nd gallery image above). A photo mosaic painting effect can be generated in Studio Artist by encapsulating a folder of images into a movie file, and then loading that movie file as a Movie Source Brush (as shown in the 3rd gallery image above).
The grid photo mosaic creates a very abstract source image representation at this particular canvas resolution. Studio Artist is capable of many more sophisticated photo mosaic imaging effects that can adaptively size and position and split mosaic sub blocks to much better represent the representational features in a source image. But for this particular effect, rather than modifying the way I generated the photo mosaic grid to build better source feature representation, I wanted to use a feature overlay to do it instead.
There are many different approaches one could take to build source feature overlays (using edge generating image operations for example). The approach I chose for this example was to use the Vectorizier and it’s Outline Main Technique.
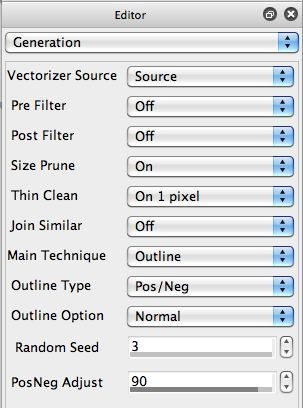
The Vectorizer Outline technique allows for the creation of vector overlays that can be inserted on top of an existing canvas image without completely covering the canvas (like the Image technique would typically do). The first gallery image below shows the vectorizer outline I used for this effect. The outline effect generates the black regions in the image (shown here overlaid on top of a white canvas).
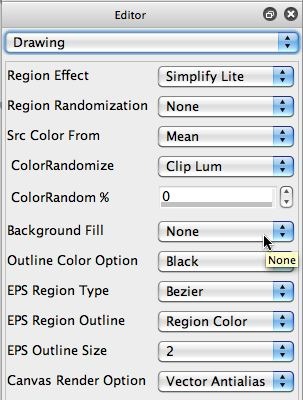
The other gallery images above show the 3 vectorizer control panel settings used to generate my representational overlay outline. Note that I’m using a Simplify Lite setting for the Region Effect parameter to produce a stylized source representation. And note that the Background Fill parameter is set to None, because I want to overlay the generated vector outline on top of my existing canvas image. The Outline Color Option is set to Black.
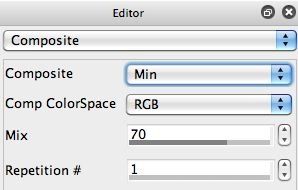
When I first generated the effect, I felt that a full 100% black outline was a little too strong visually. So I changed the Composite control panel settings to use a 70% Mix with a Min composite setting, which made the overlay a little more subtle leading to a better final image.
By working with different Region Effect settings, and different Outline Types for the Outline Technique, you can create a wide range of different Stylized representational outlines. So you can very accurately reproduce the source image features if you wish, or you can go the other direction and get very abstract.
For More Information
Here’s a tip on building a movie brush to create photo mosaic effects in Studio Artist 4.





1 Comment