Today’s post is the second part in a simple exercise that shows how to modulate a paint synthesizer parameter associated with generating one movie’s paint animation output, where the parameter is being modulated by a second movie file.
The second Movie we will be using as a modulation source was generated in yesterday’s post. It’s a simple black and white circular gradient that changes shape over 100 frames. It was generated by using a temporal generator to procedurally modulate an editable parameter associated with a simple MSG preset.
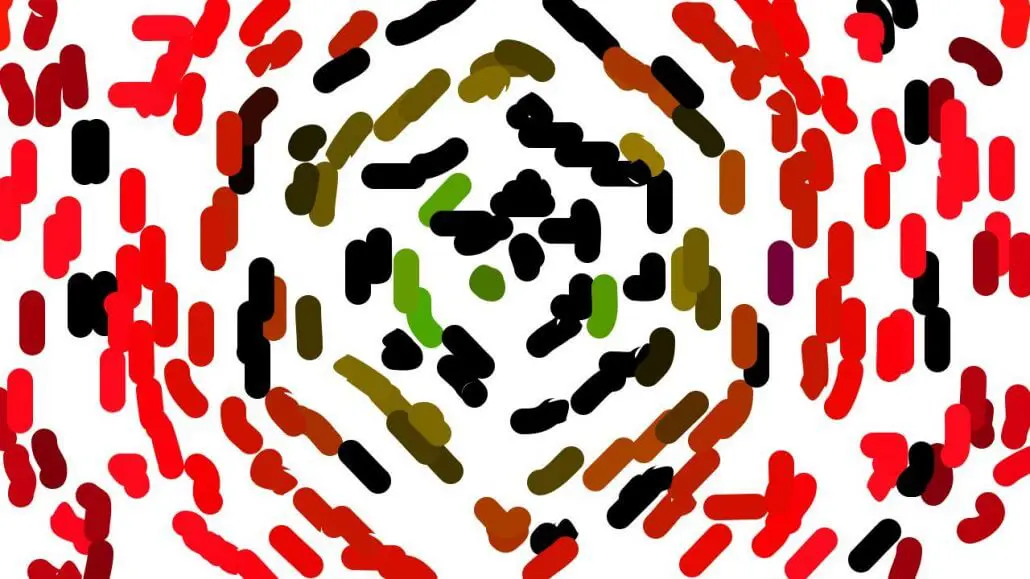
I wanted to create a very simple auto paint effect for today’s example to keep things simple. It paints 200 paint strokes for each output frame. Each individual paint stroke’s angle is modulated using the movie file we generated in yesterday’s post. Because yesterday’s movie file generates a simple evolving circular shape, it’s easy to see the effect of that modulation on the individual paint strokes generated in today’s animation.
I’m using a static source image for today’s paint animation example, but we could just as easily have used a source movie file for today’s auto-rotoscope processing.
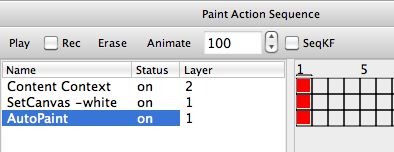
The paint action sequence (PASeq) used for today’s movie modulated paint animation example is shown below.
Note that the first Content Context action step is associating yesterday’s black and white circular animating shape movie as a default movie background for layer 2. You should read this previous post on working with Content Context action steps if you don’t understand how to create this first action step.
The second action step just erases the canvas to a white background.
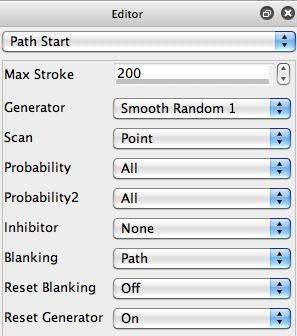
The 3rd auto paint action step using a simple paint preset that paints 200 paint strokes based on the static source image of a woman’s face i’m using for this example. The 2nd gallery image above shows the Path Start control panel. Note that I have the Max Stroke parameter set to generate 200 paint strokes.
Also, note that I have the Reset Generator parameter turned On. By doing this I will use the same set of 200 path start locations for each generated output frame in my auto-rotoscoped movie output. I did this so that you could easily see the effect of modulating the path angle of each individual paint stroke over time using our black and white background movie content in layer 2. The individual paint strokes generated in each output animation frame are always positioned at the same starting points in each frame. So the only effect you see changing is how the modulating path angle based on yesterday’s evolving shape movie file changes their shape over time.
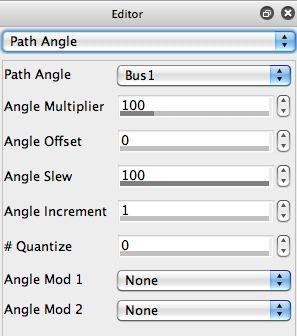
The 3rd gallery image above shows the Path Angle control panel. Note that the Path Angle is set to the Bus option.
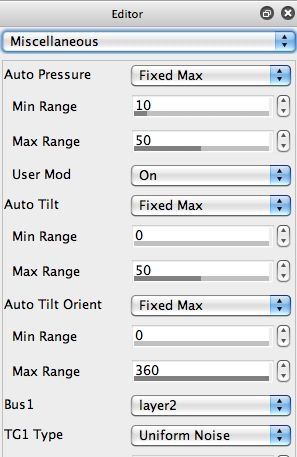
The Bus modulator is based on spatially modulating with the contents of a specific layer. The specific layer used as the Bus modulator is determined by the Bus parameter setting in the Miscellaneous control panel (4th gallery image above). Note that the Bus parameter is set to layer 2. This is the layer that we have associated a default movie background with using our first Content Context action step in our PASeq.
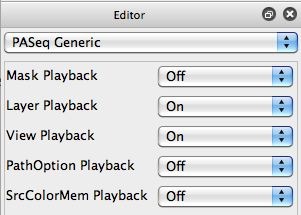
In order for this PASeq to play back properly, we need to insure that Layer Playback is turned on for the PASeq preset ( as shown in the 5th gallery image above).
I’m also using layer 2 as a hidden layer that contains the movie file used for path angle modulation. I don’t want to see this layer in the canvas display used for our auto-rotosocoped movie file output. So I made sure that the canvas View control in the main operation toolbar at the top of the interface was set to View Current Layer (as shown in the 6th gallery image above).
The final simple paint animation generated in this example can be seen here. Note how the paint strokes change their local angles based on the modulation created by the black and white circular shape animation movie file generated in yesterday’s post.
The PASeq preset used to create this effect is available Mod.paseq Please keep in mind that the first Content Context action step in the PAseq is going to have to be rebuilt or edited to work properly on your computer, since it references the pathname associated with the movie file on my computer that was generated in yesterday’s post.
You could of course use a much more sophesticated modulation movie file, as well as a more sophisticated paint animation effect. And you could be processing a second source movie as opposed to a static facial image like we are in this example. We kept things very simple in today’s paint animation effect to help get across how the Bus modulation based on the black and white shape movie file was working. So while the final animation effect might not be very exciting or visually sophisticated, I hope this makes it clear how the evolving circular shape in the movie file generated in yesterday’s post is modulating the paint stroke path angles in today’s movie example.

