Skip to content
You can certainly build a finished painting in Studio Artist using a single paint or other effect preset. However, the real power of Studio Artist is the synergistic ability to combine together different paint presets and other visual components that work together to build up a particular artistic style.
Today’s post will take a look at one simple ‘paint strategy’ that works with edited versions of a single paint preset in combination with a few image operation effects to create a rough textured paint style.
Most compelling visual effects are created by multiple presets that work together to build up the final finished effect. How different individual effect components work together to create a final finished visual effect can be thought of as building a ‘paint strategy’ to create the finished effect. You can think of a ‘paint strategy’ as a recipe you follow to build the final finished effect.
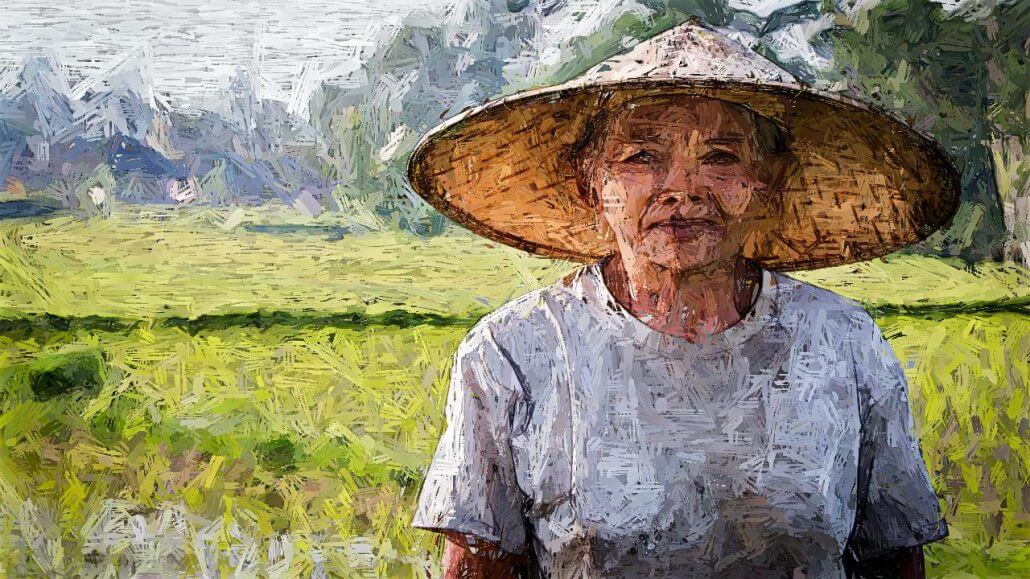
The paint action sequence (PASeq) used for the landscape painting at the top of the post is shown below.
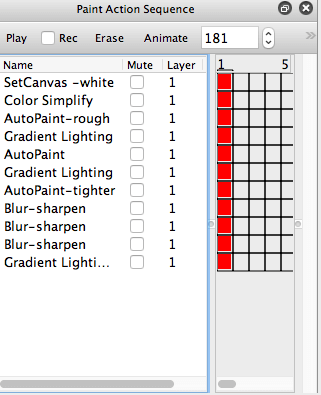

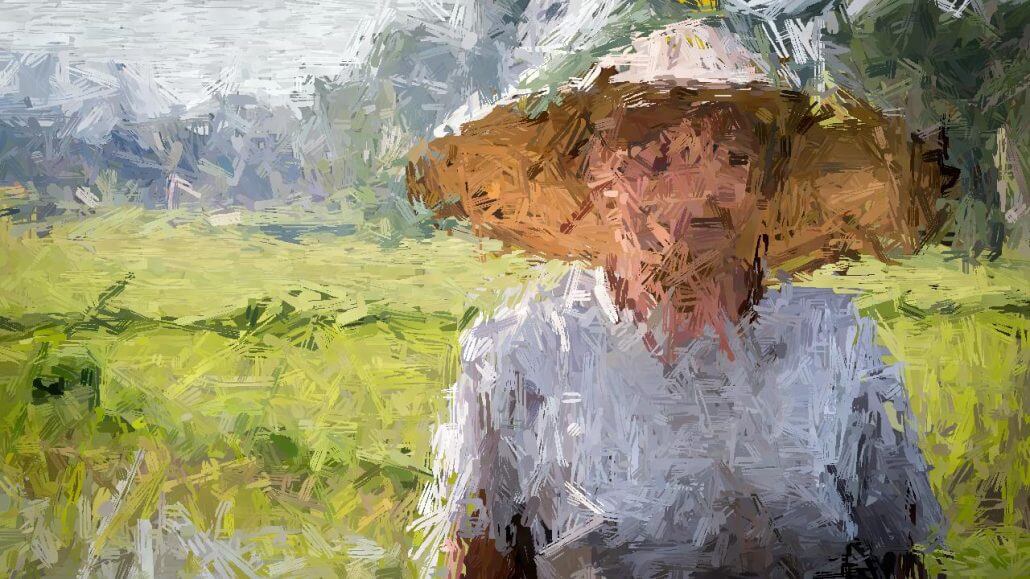
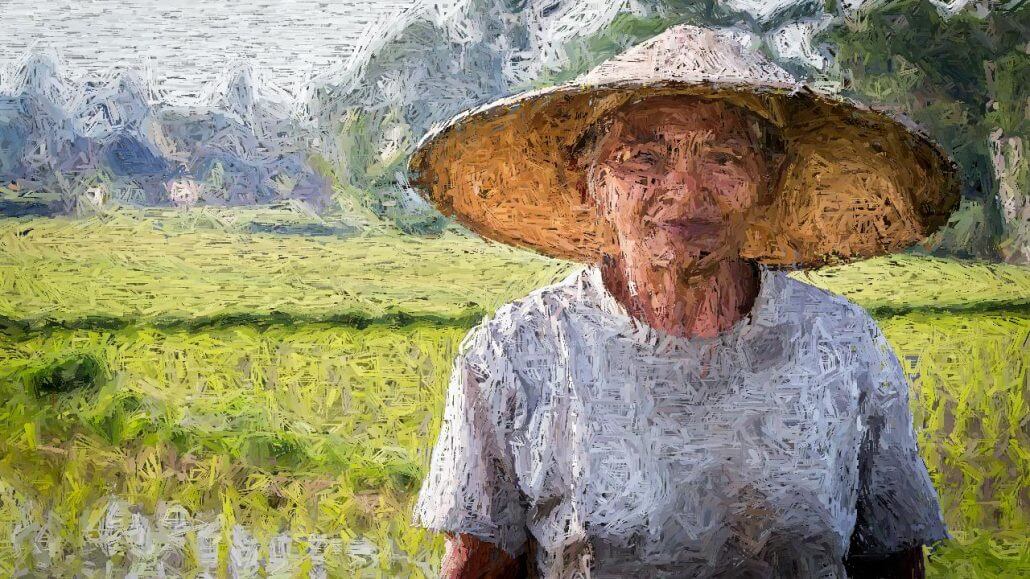
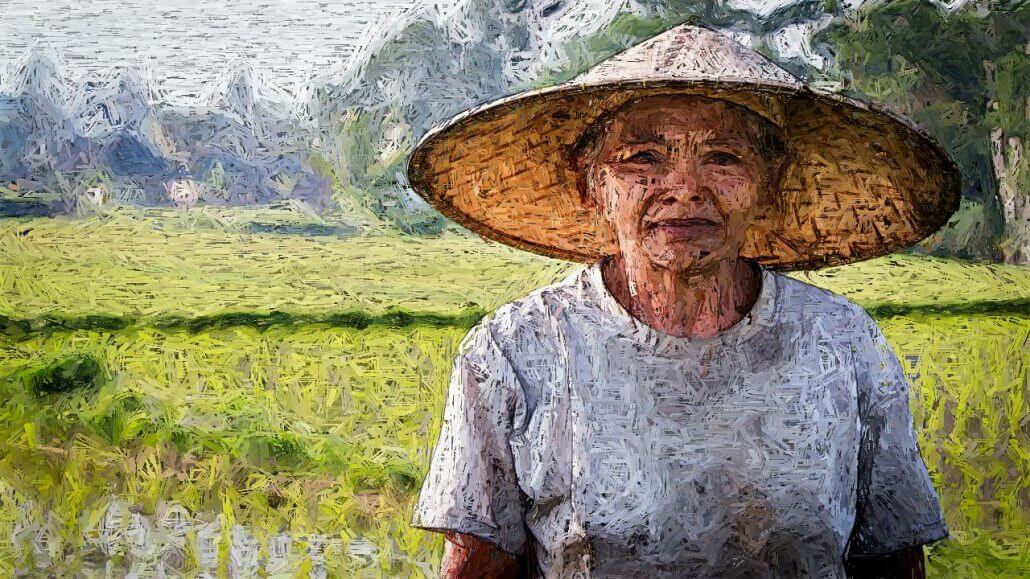
The 3 auto paint action steps were made with edited versions of the same paint preset. You can see what the 3 auto paint action steps paint by themselves in the 2nd,3rd, and 4th gallery images above. So, the 3 paint steps are designed to first rough in the canvas with large paint strokes and then progressively work with smaller brush sizes that auto mask to local color regions for the 3rd auto paint step to paint in increased source edge detail into the finial finished painting. The last image adds some additional edging.
This strategy of initially roughing in a painting and then introducing finer and finer detail is a typical paint strategy. In order to implement it you work with multiple edited versions of a paint preset recorded as multiple steps in a paint action sequence.
I could have build my paint presets to incorporate lighting effects directly into the individual paint strokes. But I choose to do that using an image processing action step (using the Gradient Lighting image operation effect). I apply a subtle gradient lighting effect after each individual auto painting action step. This helps give the painting a more 3-dimensional textured quality. Also, the image processing modifies the underlying painting surface, so it helps distinguish the existing painted strokes on the canvas from the new ones added after the gradient lighting processing.
I could have initially started by erasing the canvas to a solid color like white or black. But I decided to use the Color Simplify image operation effect to set the canvas to an initial flat color region representaiton of the source image. That way I could ignore any lack of complete overage with my individual auto-painting action steps (since the canvas starts out with flat source image coloring).
I could also start by setting the canvas to the source image and then overpainting on top of the source image. Of if i’m working with hard edges paint strokes (the case for this particular preset), I could use an interpolation image operation effect like Geodesic Interpolation to automatically fill in any remaining white space after the first auto paint action step.
The last 3 action steps are just finishing cleanup steps. I used a Blur image operation effect in combination with an Edge1 Composite setting to build a series of variable frequency sharpening effects to subtly boost the final painted image. Remember, Studio Artist’s built in compositing options for all of it’s image processing effects let you dramatically change the visual quality of those effects, changing a blur effect into a sharpen effect in this particular case.
The PASeq preset used to create this effect and it’s associated paint strategy PaintStrat.paseq