This post covers several different Studio Artist features that were used to build the following black and white sketch. The sketch was generated from a series of 25 different facial images, so it’s a sketch of a virtual face rather than a specific face since the sketch features are derived from all 25 source images. The paint synthesizer sketching preset is also drawing a MSG chaotic attractor.
Stack Filtering involves working with a stack of disparate images encoded into a movie file. Many stack filtering examples posted on the Studio Artist User Forum involve processing the stack of images with temporal image processing operations. But you can also build stack filtered images by making a paint action sequence (PASeq) and then processing some or all of the images in the stack with the PASeq to build a generative stack filtering process (like we’re doing in the example in this post).
Encoding the stack of images as individual frames in a movie file allows for a set of images to be opened as a single source movie. You can think of the stack as being a folder of images if that makes visualizing what is going on easier.
The PASeq below was used to generate the sketch above. Note that there’s only a single AutoPaint action step in it.
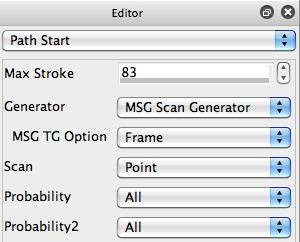
The paint synthesizer preset used for the AutoPaint step is has a MSG preset embedded in it. The MSG preset is used as a MSG Scan Generator in the Path Start control panel (as shown in the second gallery image above).
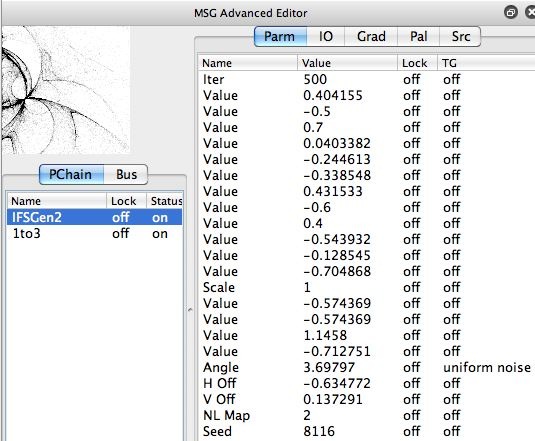
The MSG preset used to generate the path start points for painting is shown in the third gallery image above. Note that a Uniform Noise Temporal Generator (TG) is specified for the Angle parameter for the IFSGen2 processor. I did this so that the chaotic attractor would be randomly rotated for each cycle of AutoPaint sketching over the course of the 25 cycle animation that builds up the complete sketch.
The IFSGen2 processor normally generates a black and white image of an IFS chaotic attractor. When embedded in a paint preset and used as a MSG Scan Generator, the processor generates a series of path start points that correspond to points on the chaotic attractor.
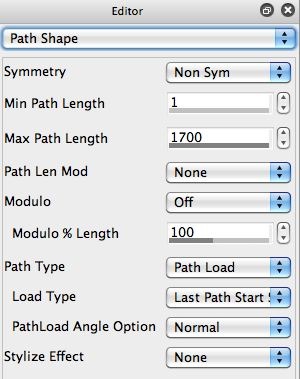
The 4th image in the gallery above shows the Path Shape control panel settings for the sketch paint preset. Note that the path being generated is using a Last Path Start Spline to path load type. What this means is that a smooth path is drawn from the previous path start point to the current path start point. Since the path start points are individual points on the chaotic attractor, this path shape setting builds a continuous smooth sketch curves that traces through the individual chaotic attractor path start points one by one.
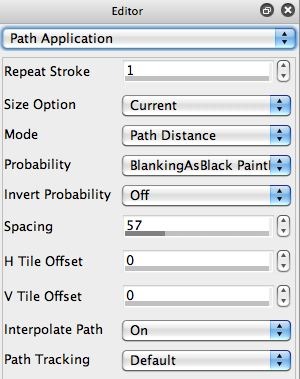
The 5th image in the gallery above shows the Path Application control panel for the sketch paint preset. The BlankingAsBlack PaintLumErr setting for the Probability parameter is what helps makes the sketch preset intelligent. The various Probability settings allow for paint paths to intelligently stop drawing at specific points in the canvas. The particular setting used allows the sketch shading to build up until the source image is properly represented and then drop out if continued drawing in a local area of the canvas would obscure representing the source image.
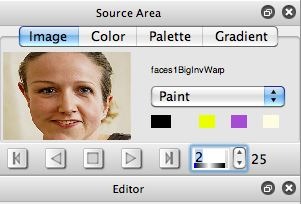
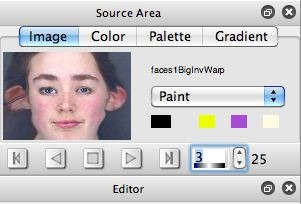
Note that the Path Start control panel for the paint preset only uses 83 start points (Max Stroke setting). I set this parameter to a small setting so that the sketch could build up over multiple cycles of PASeq processing over the course of the complete 25 cycle animation. Each animation cycle is processing a different source frame in the loaded source movie that contains the set of facial images i’m using as my stack filtering source. You can see a few of the individual facial images in the image stack source movie below.
Note that all of the individual facial images in the source movie past frame 1 are warped so that their eye and mouth facial features are spatially aligned. The image in frame 1 is the reference image, so every other image is warped so that the facial features match up with the facial features of the frame 1 face.
I generated the spatially aligned image stack using the Studio Artist inverse warp functionality prior to building the sketch effect. The mechanics of how to do this are discusses in the second link reference below if you are curious about it.
We briefly covered a lot of different topics in this post. I hope it gives you a feel for how you can combine together different Studio Artist features together to build very elaborate processing effects. I like the notion of being able to sketch or paint a complete set of images as opposed to just working with a specific image. It’s an approach to move beyond representational painting derived from a single source image. The sketch generated by the process above is a sketch of a virtual face with individual characteristics of all 25 source faces used to build the sketch.
For More Information
Here’s a tip on using MSG to extend the paint synthesizer functionality.
Here’s an article on stack filtering that also shows how to build a spatially aligned image stack using an inverse warp context action step.




1 Comment