Yesterday’s post showed how to use the Vectorizer to convert a flat color region line screen image processing effect into a smooth anti-aliased vector output effect. In today’s post we will show how to use the Vectorizer to extend the same line screen effect generated in yesterday’s post, adding additional abstraction to the final effect.
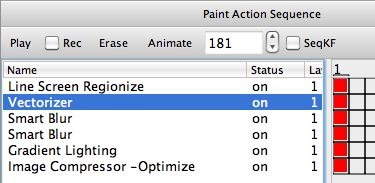
The paint action sequence (PASeq) shown below was used to generate the image above.
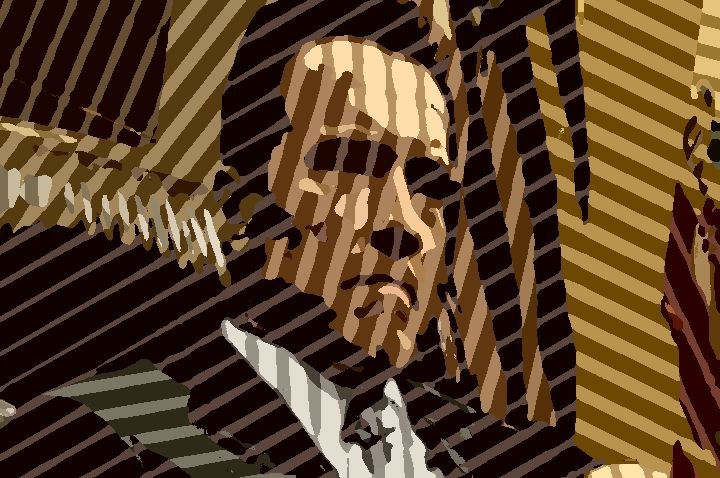
The first action step using the Line Screen Regionize image operation effect is exactly the same as the one used in yesterday’s post (as shown in the second gallery image above). In yesterday’s post, we then used the Flat Input option for the vectorizer’s Main Technique to convert the raster line screen effect into a vector representation. For today’s effect post, I was interested in extending the image abstraction generated by the line screen effect. So I used a modification of yesterday’s vectorizer preset to process the line screen raster canvas, abstract it, and then combine the vectorized abstraction on top of the existing line screen canvas image.
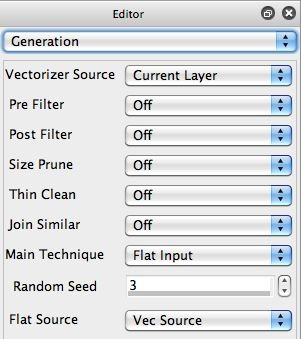
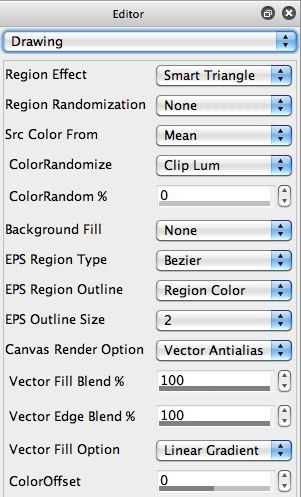
The 3rd,4th, and 5th gallery images above show the vectorizer control panel settings used in the second action step in the PASeq shown above. Both yesterday and today’s vectorizer action steps use the Flat Input technique, processing the raster line screen canvas image as input. The key difference between yesterday and today’s vectorizer preset settings is that today we’re using the Smart Triangle option for the Region Effect, and the Background Fill parameter is set to None. What this does is generate an extremely abstracted vector representation of the original line screen input, and then overlay those abstracted vectors on top of the existing raster line screen canvas.
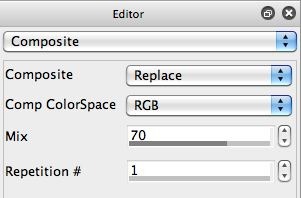
The end result of the vectorizer processing is to provide a whole level of additional source image abstraction to the overall effect. I used a Mix setting of 70% in the 5th gallery control panel image above so that there was some partial transparency associated with the abstracted vector overlay.
The 2 Smart Blur action steps were used to smooth out the rough line screen edged associated with the original line screen raster effect (which has hard aliased edges). I then used the Gradient Lighting image operation to add a subtle amount of raised lighting to the effected canvas, and the Image Compressor image operation effect to boost the overall contrast for the final effect output.
So, in yesterday and today’s posts we have seen 2 different approaches you can take when working with the Flat Input vectorizer technique. Remember, this vectorizer technique is used to directly convert an existing flat color raster image into a vector representation. You can make the conversion highly accurate if you want to just convert the raster image into a smooth anti-aliased vector representation. Or, you can abstract it (subtly or extremely) and then overlay the new vector shapes on top of the original input canvas (as we did in today’s post to enhance the level of effected abstraction in the original flat color raster processing effect.




1 Comment