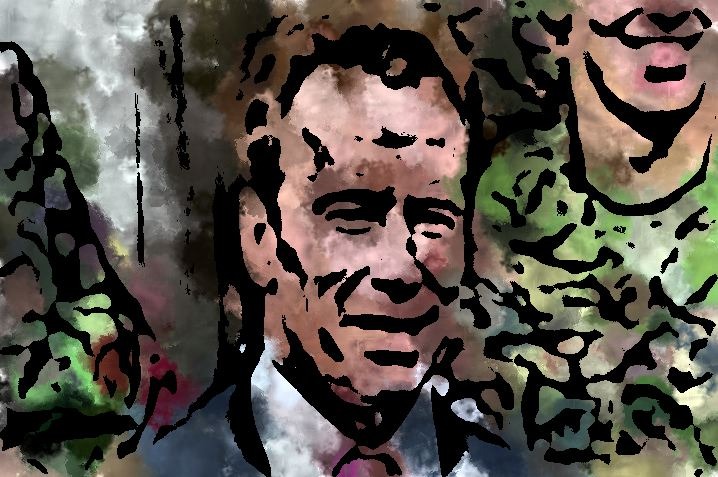
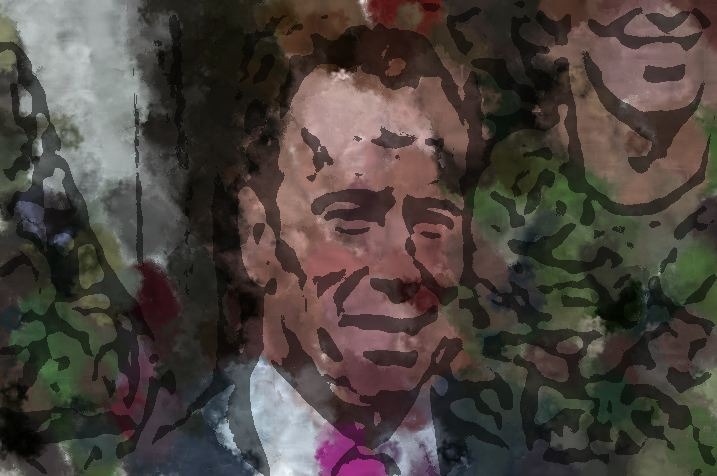
The followng simple painted example shows how you can use the generic ‘compositing options in Studio Artist as an alternative to working with multiple layers when building up artistic effects. In this particular example, I wanted to add some black outlining to a really loose painted canvas to bring in some source image representation detail to the painting. So I wanted the black outlining to overlay onto the existing painted canvas.
One approach to overlaying dark or black elements into an existing canvas is to use Min compositing. Min stands for minimum. Compositing refers to an image processing algorithm that takes 2 different images as input and combines them in some way into a single output image.
Studio Artist Layers have built in compositing as well as partial transparency controls for each layer. But every Studio Artist operation mode that generate visual effects also contains built in generic compositing as a part of the effect. So the output of a given effect can be composited with the visual contents of the existing canvas layer.
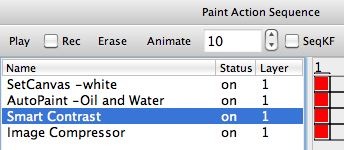
The Paint Action Sequence associated with the painted canvas at the top of this post is shown below.
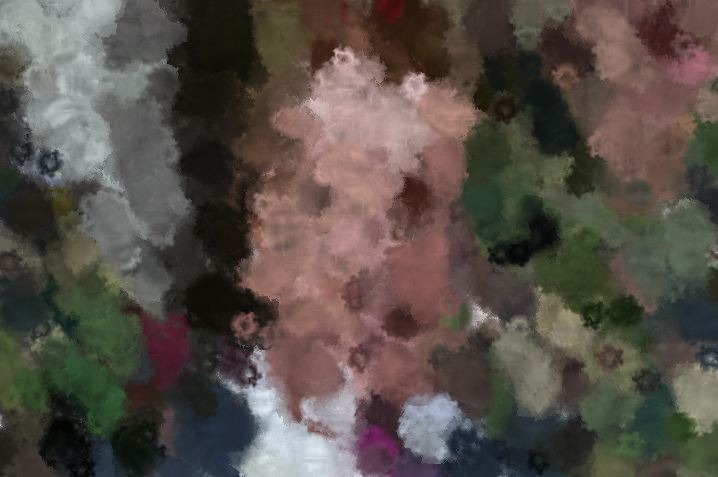
Note that there are 4 different steps in the PASeq. The canvas is first erased to white. An ‘Oil Paint and Water’ paint preset (Default :General category in 4.02) is then used to automatically paint in the canvas. You do this by selecting the paint preset and then pressing the action button. I let it draw until I was satisfied with the results, then pressed the spacebar to stop the auto-painting. It generates a real loose color painting without a lot of representational detail.
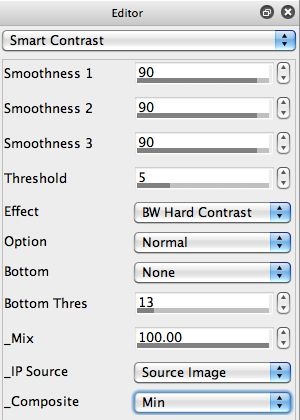
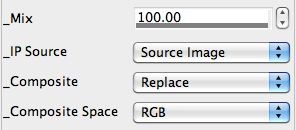
I then used the Smart Contrast image operation (Ip Op) to generate a black and white outlining effect that accents positive and negative space in the source image. The settings for this particualr effect are show below.
Note that i’m using the Source Image option as the Ip Source for the effect. And i’m using the Min option for the Composite setting. I’m using min compositing because I only want the black parts of the effect output to show up in the painted canvas (not the white parts of the effect). So I want the black part of the effect to overlay the existing painted canvas.
I then used the Image Compressor Ip Op to auto-boost the contrast of the finished painting. Putting this final finishing step at the end of the PASeq leads to a lighter painted background than if I had recorded it in the PASeq prior to laying down the black outlining Smart Contrast effect.
The images below show how the various steps shown above work together to build up the final image. The first one shows the canvas after the AutoPaint step. The second one shows the output of the Smart Contrast effect if I had used replace compositing instead of min compositing (which would just replace the canvas with the black and white effect output). The third image shows the canvas after min compositing the Smart Contrast effect into the auto-painted canvas.
An Alternate Approach Using 2 Layers
Of course there are usually several different ways to build a particular effect in Studio Artist. I could also have generated this particular effect using 2 different layers. The results of the auto-painting step would be placed in layer 1. The results of using the Smart Contrast Ip Op with the replace composite option would be placed in layer 2. Layer 2 would be setup to use Min compositing for the layer, which you can specify in the Layer Palette (as shown below).
If I was using 2 layers to build the effect, I would also use the View All display option for the canvas view. You can set this using the view popup in the main operation toolbar (the view popup is the icon popup control on the right side of the screen snap below, and is set to the View All option).
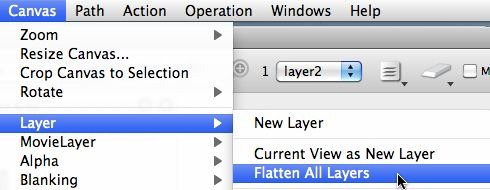
After building the effect using 2 layers, I could then run the Canvas : Layer : Flatten All Layers menu command to flatten the 2 layer min composted view down into a single image in a layer.
Generic Compositing Effects
The whole point of the built in standardized composite options in all of the Studio Artist effects is that it provides a way to build multi-layer effects working with just a single layer, avoiding the complexity and extra work involved in using multiple layers to build the effect. It’s like a virtual second layer is automatically built for you on the fly, and then directly composted into the existing canvas.
The generic Composite options are available in Studio Artist effects like Image Operations, Texture Synthesizer, MSG, Vectorizer, Warp, Adjust. By generic I means that they are a standardized set of controls (as shown below for image operations).
The Mix control lets you make the effect output partially transparent, mixing it in with what is already in the canvas. So this is like using the Transarency adjustment when working with multitple layers.
The Composite control lets you specify the compositing algorithm used to combine the effect output with what is already in the canvas.
The Composite Space control lets you specify the color space the compositing will take place in. Typically you leave it set at the RGB setting. However, the Luminance and Hue options let you composite only those color channels of the effect output into the canvas.
The mix control actually mixes the composited effect output to the canvas, so if you set the Mix to 50% transparency with Min compositing, then only the dark min composited parts of the effect output will be made partially transparent. So if we set the Smart Control Mix control used above to 50%, then the black outlining would be made partially transparent (as shown below).
Judicious usage of the Mix control is a good way to soften the impact of overlaying hard outlines (like the black outline we created above). It’s another effect option in your arsenal, like the different Composite settings, which can radically change what a particular effect does.
If you want to get a feel for this, try working with the Blur Ip Op to process an image and try out different Composite options. You will note that the Edge1 composite option actually turns the blur effect into a sharpening effect.
In Conclusion
Again, in the original approach we outlined at the top of this post for overlaying a black outlining effect into an existing painted canvas, we used the generic compositing controls available in the image operation effects to build the overlay effect. We used Min compositing because it takes the darkest part of each of the 2 input images to the compositing algorithm and places that darkest part on the resulting output canvas.
If I wanted to apply a white outline effect as an overlay to an existing painting I would have used Max compositing to do it. If you duplicate the steps above with the same effects you can see the difference this makes.
There are many other composite options. The best way to get a feel for what they do is to play around with them and observe the visual results.

