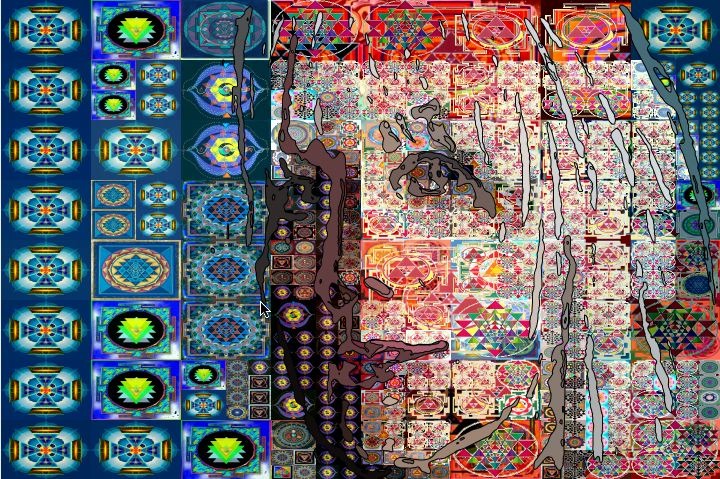
This post will discuss how to re-use a PASeq like this, since it can easily be re-edited to reference a different movie brush file and associated auto-selection tiling size for the new movie brush you want to work with. We’ll also use a Vectorizer Outline Technique preset to overlay some additional facial features (as seen above) on top of the tiled grid photo mosaic canvas generated by the edited PASeq.
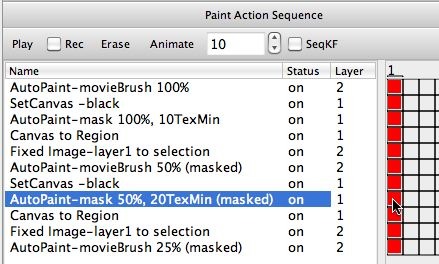
The paint action sequence (PASeq) shown below is what we generated in our previous post on how to automatically generate a sub-nested regular adaptive tiled photo mosaic image based on a movie brush. Please note this applies to Image Folders as well
Re-Editing the Movie Brush Action Steps
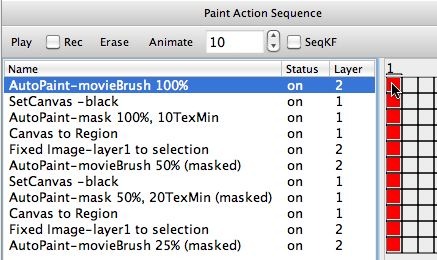
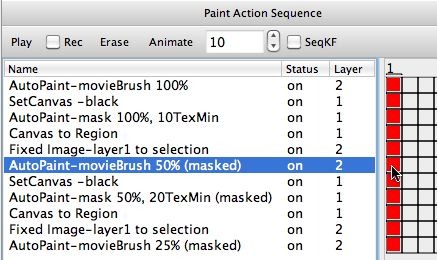
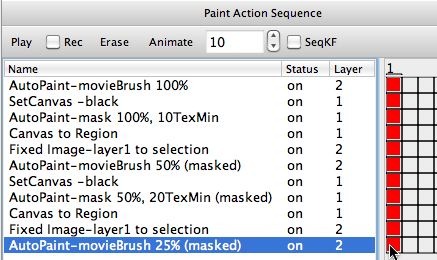
The PASeq has 3 different action steps that reference a movie brush, as shown in the first 3 gallery images above. It’s easy to edit these individual action steps to reference a new movie brush. There are 3 things you need to do for each action step to edit it to reference a new movie brush.
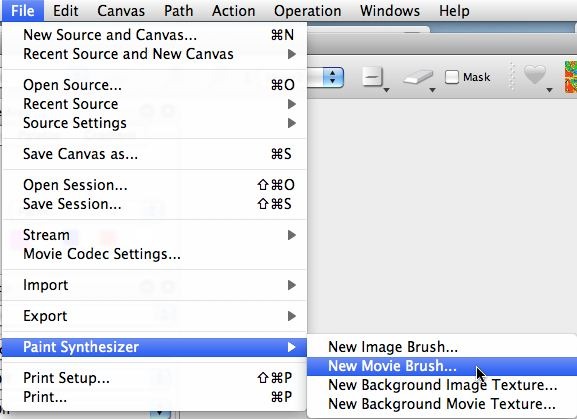
First, you click on the red keyframe at frame time 1 for the action step to playback the action step. This will play it back using the original movie brush it references. Then, run the File : Paint Synthesizer : New Movie Brush menu command (shown in the 4th gallery image above). Select the new movie brush you want to use for your new photo mosaic effect. The 5th gallery image above shows the Brush Source control panel after I selected my new movie brush named yantraMB_180x120.
To record the change you made to the AutoPaint action step, you now option click the red keyframe cell associated with frame time 1 for the action step.
You need to follow these 3 steps for each of the 3 selected action steps shown in the first 3 gallery images above that reference movie brushes internally. This will edit all 3 of the movie brush action steps to use your new movie brush (as opposed to the older one they initially referenced).
Re-Editing the Selection Mask Generation Action Steps
Our PASeq also auto paints tiled selection masks. The tiling size for these action steps is based on the Brush Source Horizontal and Vertical Size parameters, which need to be re-edited to match the new size of our new movie brush (180×120 pixels in this particular case).
The first 2 gallery images below show off the 2 selected AutoPaint action steps that paint in a tiled selection mask. So these 2 action steps need to manually be edited to use our new movie brush sizing. Again, there are 3 things you need to do for each action step to edit it to reference the new movie brush sizing.
First, you click on the red keyframe at frame time 1 for the action step to playback the action step. This will play it back using the original source brush sizing it references. Then, go to the Brush Source control panel, and manually edit the Horizontal and Vertical Size parameters so they match the sizing of your new movie brush (180×120 pixels for this particular example) as shown in the 3rd gallery image below.
To record the change you made to the AutoPaint action step, you now option click the red keyframe cell associated with frame time 1 for the action step.
The original PASeq has now been edited. It now references your new movie brush as opposed to the old movie brush. The tiling size for the movie brush action steps automatically tracked the sizing of the movie brush. And we manually edited the tiled selection mask generation auto paint action steps to match the new source brush size.
At this point you can export the edited PASeq if you wish to save a copy of it that references the new movie brush and associated brush sizing. To export a PASeq you can either run the appropriate FIle Export menu command, or use the Export Paint Action Sequence context menu command (control click in the PASeq editor on mac, right click on windows).
Adding the Vectorizer Outline Technique Overlay
I decided that I wanted to use an additional edge feature Vectorizer outline overlay to make the final photo mosaic image more interesting. Working with the Vectorizer or different Image Processing or Paint Effects to artistically modify a photo mosaic image is a fun way to generate new kinds of artistic styles based on photo mosaic movie brush imagery.
It also gives you the ability to be a little more abstract as far as the photo mosaic construction is concerned. Using the Vectorizer or Image Processing or additional Paint effects to help visually anchor the image by having them add some form or hint of source image feature definition to the overall final image.
To generate the outline overlay, I used the Vectorizer Main Technique parameter setting called Outline (as shown in the first gallery image below). We’ve discussed this vectorizer technique here before, it’s very useful for adding source detail or other overlays on top of an existing painted canvas.
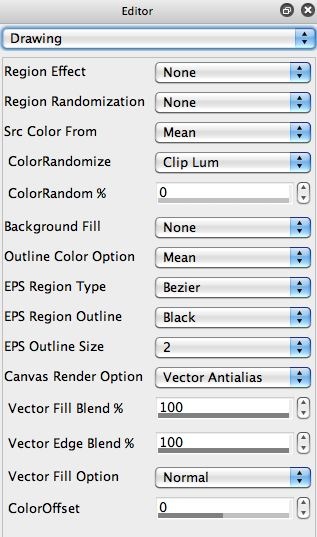
The 2nd gallery image above shows the Drawing control panel for the Vectorizer. Note that I set the Background Fill parameter to None (which is essential to generate an overlay effect on top of the existing canvas). The Outline Color Option parameter is set to Mean, so it’s colored based on a color sampling of the source image underlying the outline region. I set the EPS Region Outline parameter to Black, to help accent the colored region overlays (which are a little too subtle if rendered just as flat colored regions).
I ran this Vectorizer preset twice, with a PosNeg Adjust parameter setting (Generation control panel) of 90 and then 70. Making that parameter smaller leads to smaller outline overlay regions for the Outline Type parameter setting we are using (Pos/Neg in this particular case).
I could have recorded these 2 additional Vectorizer actions as 2 additional action steps at the end of my PAseq if I wished to build them into the new PASeq I edited (which references the new movie brush file for the tiled photo mosaic drawing process).

