Today’s post will look at a Truchet patterning based abstraction. Sebastian Truchet first looked at tiling patterns (called Truchet patterning) in 1704. MSG offers several different processors that let you generate a wide variety of different Truchet like tiling patterning effects. Some of these processors also allow for adaptive modulation of the patterning based on an image modulator, which increases the range of representational abstraction effects that can be generated from this style of repetitive geometric patternings.
The 3 step paint action sequence (PASeq) shown below was used to create the effect above. Note that it is composed of a MSG effect, a Colorize ip op effect, and a Vectorizer overlay effect that work together to build the final patterning abstraction image.
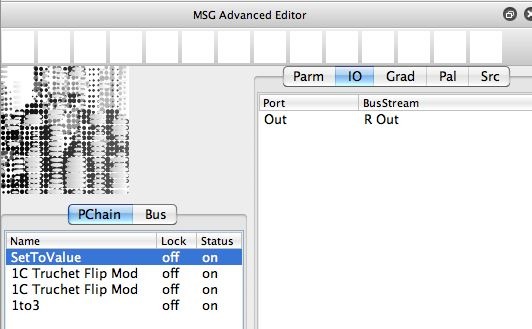
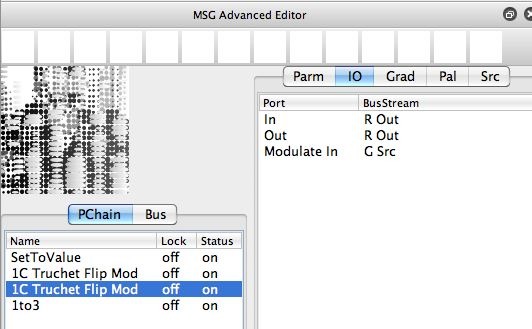
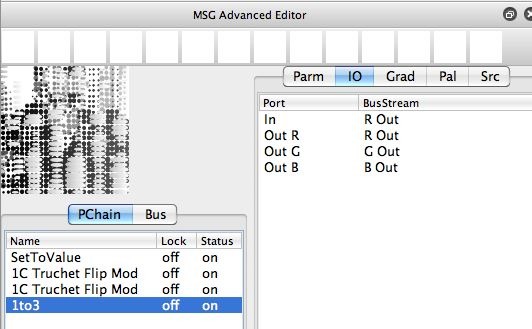
The MSG preset uses 2 1C Truchet FlipMod processors to build adaptive truchet like patterning overlays that are modulated by the source image. You may recall that the 1C naming abbreviation for MSG processor names means that the processor generates a single black and white image stream output. This particular processor overlays the patterning it generates on top of it’s existing input stream, so you can stack them to create more elaborate overlaid patterning effects.
The 2nd,3rd,4th, and 5th gallery images above show off the IO (input-output) routing connections for the MSG effect used in the first MSG action step in the PASeq. The 6th gallery image shows off mutated variants of the MSG effect in the Evolution Editor. Note that the effect generates a grayscale patterning with no source color rendition. The GSrc (green image channel) of the source image is attached to the Modulate In ports of both 1C Truchet FlipMod processors. The green channel of an image is a rough approximation of the images luminance, so we used that to modulate the patterning based on source image characteristics. We could have used a RGBtoYIQ processor to generate a more accurate luminance image stream if we wanted to create a more perceptually true luminance modulation for the patterning. Or build an edge map image stream and then modulated the patterning based on that.
One key conceptual idea to get out of this post is that you can build a patterning or texture as a grayscale image, and then colorize it after the fact (as opposed to being forced to construct the patterning texture as a color texture when it is first created). Studio Artist offers a number of different approaches you can take to colorize a grayscale image. The one we used in this example is the Colorize ip op effect, whose control panel settings are shown below.
The Colorize ip op can be configured to create a wide range of different visual effects. The particular parameter settings shown above are a useful effect to take the existing canvas image and colorize it based on the colors of the source image. You could experiment with different Color Space parameter settings to change the look of the source colorization taking place in the canvas image.
I wanted to add a little more representation feature structure from the original source image into my patterned abstraction effect. So I used a trick we’e shown here before, using the Vectorizer Outline Technique to add a source feature based outline representation overlay on top of an existing abstracted canvas image.
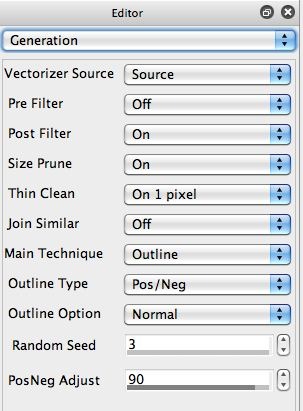
The 2nd,3rd, and 4th gallery images above show off the control panel settings for the Vectorizer action step used in my PASeq that generated the effect above. The Generation control panel shows that i’m using the Pos/Neg option for the Outline Type parameter associated with the Outline Main Technqiue.
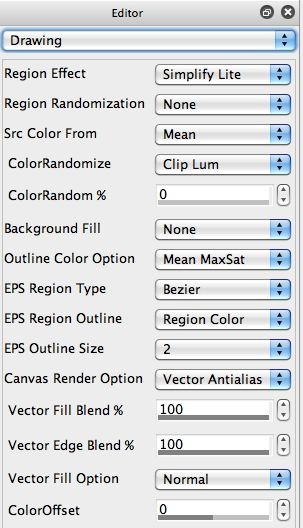
The Drawing control panel shows that I set the Background Fill parameter to None, which is the key to generating a partial overlay effect on the existing canvas. We have shown the use of the Outline Color Option set to Black here before when adding this kind of feature overlay. I selected the mean Max Sat setting for the Outline Color Option parameter to better match the overall aesthetic feel of the patterning effect I was trying to achieve.
I wanted the source feature overlay to be loose, so I added a Simplify Lite Region Effect. And I used a Vector Antialias Canvas Render Option so my overlay was a vector overlay with smooth edges.
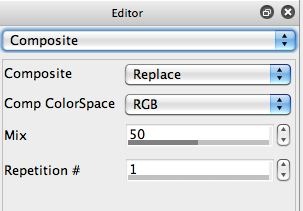
I also set the Mix parameter in the Composite control panel to 50%, so that the overlay mixed in with the existing patterning to create a more unified effect. A 100% Mix overlay overpowered the existing patterning too much for the look I was trying to achieve in the final abstraction effect.
In conclusion, we’ve used a number of different Studio Artist tricks to work synergistically together to build a new truchet patterning based abstraction effect. Again, driving home the point that the real power of Studio Artist is that it’s a very flexible environment to create an infinite variety of different visual effects.
We used MSG to build a custom adaptive grayscale patterning effect using modular processors. We then used the Colorize ip op to convert the grayscale textural patterning into a color representation of the source image. We then used the Vectorizer to overlay a source feature abstraction to make the patterned abstraction effect more representational.


