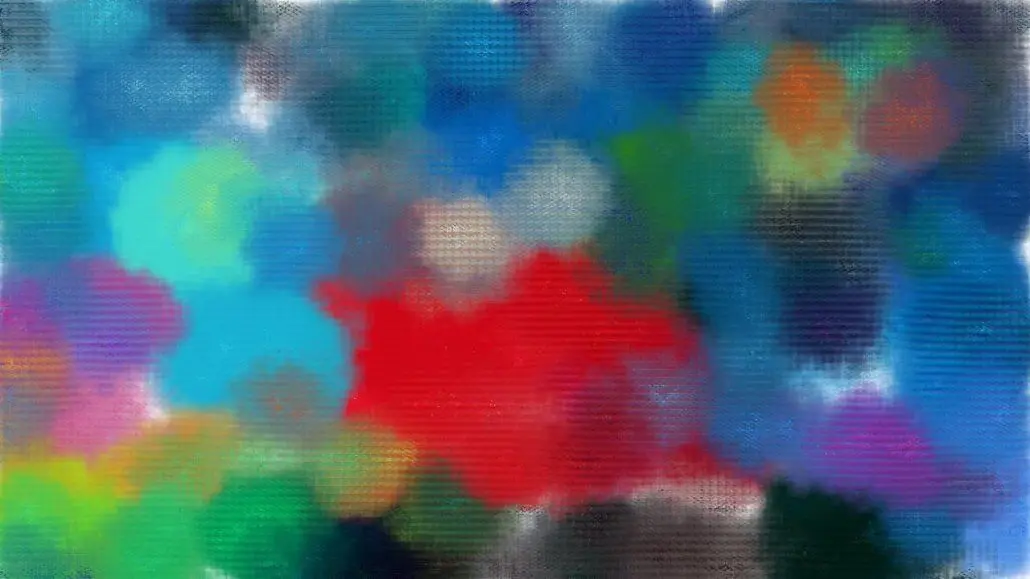
Today’s post is more of an introduction into a specific approach to building a wet paint effect in the paint synthesizer, as opposed to a tutorial on building a specific finished visual effect. The image above just shows a few wet spreading paint strokes drawn using today’s paint preset. Today’s paint preset works best for manual painting using a pressure sensitive pen and tablet.
There are lots of different ways to build wet paint effects in the Studio Artist paint synthesizer. The particular approach we are taking in today’s post is based on the Geodesic Source Brush Type. Geodesic brush types have been around since the early days of Studio Artist. The older geodesic brush types (Geodesic Circular and Geodesic Rectangular) are very different than a normal paint synthesizer paint brush. They override the Brush Source control panel and generate a dynamic spreading brush effect on the fly while painting.
The Geodesic Source Brush Type was introduced in Studio Artist 4. It combines the dynamic spreading behavior of the older geodesic brush types while also painting a full paint nib based on the Brush Source control panel settings. So a series of paint nibs spread out from the paint path dynamically while you paint in the path.
Because there is so much going on computationally when using the geodesic source brush type, it can start to lag a little if you make the Brush Source size too big or move the pen too quickly.
The particular paint preset we are working with today is available for download Wetpapertowell
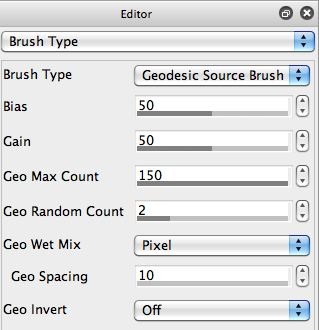
The first gallery image above shows the Brush Type control panel. Note that the Brush Type parameter is set to Geodesic Source Brush. The Geo Max Count parameter determines the amount of dynamic displacement generated by the geodesic brush type in pixels.
The older geodesic brush types would dynamically spread pixel by pixel that distance. Because the Geodesic Source Brush Type is still working with painting individual paint nibs derived off of the Brush Source control panel settings, the spacing of the individual paint nibs as they dynamically spread out will be a function of the Path Application control panel Spacing parameter setting (like it would for a normal paint preset that spaces individual paint nibs along a paint path).
Try switching the Brush Type parameter to one of the older geodesic brush types (like Geodesic Circular), and then to Source Brush, then back to Geodesic Source Brush to get a feel for what these different brush types do.
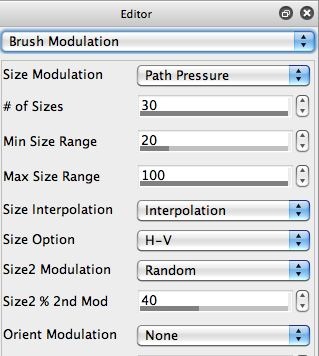
The 2nd gallery image above shows the Brush Modulation control panel. Note that the Size Modulation parameter is set to Path Pressure. So the pen pressure from a pressure sensitive tablet will dynamically adjust the brush size as you paint. Pressing lightly leads to a small brush size (and associated paint nib). Pressing harder leads to a larger brush size.
Note that a second Size2 Modulation parameter is turned on, set to the Random option. The Size2 % 2nd Mod parameter control the mix of the second brush size modulator. This adds a little more natural unpredictability to the behavior of the final wet paint preset.
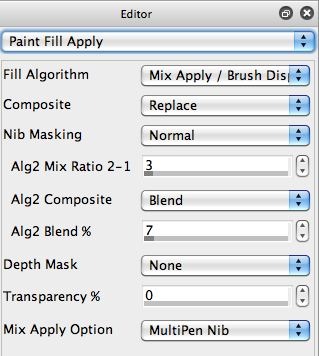
The Paint Fill Apply control panel is shown in the 3rd gallery image above. The Fill Algorithm parameter is set to use the Mix Apply/ Brush Displace option, which is good for generating wet paint effects. This is a dual fill algorithm, so it switches between an apply and a brush displacement fill algorithm. Normally it would apply a paint nib and then brush displace for X paint nibs, then repeat the cycle. X is normally a function of the Alg2 Mix Ratio 2-1 parameter, which is set to 3.
However, version 4 has a new parameter called Mix Apply Option. When set to Normal, a dual fill algorithm will work in the traditional way described above. The other options allow you to directly modulate between the 2 fill algorithms, based on the modulator specified by the Mix Apply Option setting. Note that we have it set to MultiPen Nib.
This may seem confusing, since we are painting with interactive pen mode rather than multipen mode. However, when you are working with the Geodesic Source Brush, it will setup the MultiPen nib modulator based on the geodesic distance of the current paint nib from the original paint path position it is spreading out from.
If you look at the wet paint strokes at the top of the post, you can see that there’s a rim effect at the edges of the paint stroke where it switches from applying solid paint to acting more like water. This is the transition between using the Apply fill algorithm and the Brush Displace fill algorithm (which is being modulated by the spreading distance of the dynamic spreading paint nibs for the geodesic source brush type).
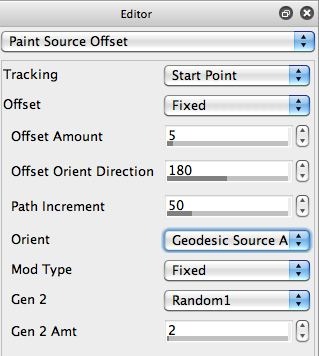
All of the different Dual Fill algorithms (except for Displace Out) are based on the Paint Source Offset control panel settings. The 4th gallery image above shows the Paint Source Offset control panel. Note that the Orient parameter is set to Geodesic Source Angle. So the paint source offset used by the brush displace fill algorithm will track the dynamic movement of the individual geodesic source brush paint nibs as they spread out.
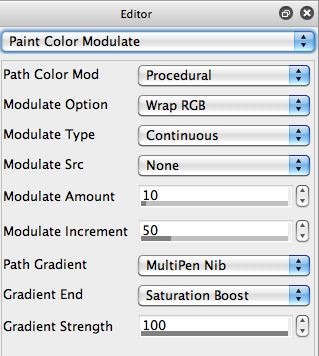
The 5th gallery image above shows the Paint Color Modulate control panel. Note that the Path Gradient parameter is set to the MultiPen Nib option. So, since we are using the geodesic source brush (which also sets this modulator as described above), the paint color will be modulated based on the dynamic position of a paint nib spreading out in the geodesic spreading pattern. You can see this color modulation in the individual paint strokes drawn at the top of the post.
That was a lot of paint synthesizer technical editing details! There is a lot going on under the hood in this wet paint preset. Hopefully the above discussion will give you some insight into how this particular wet paint effect was programmed in the paint synthesizer.

