Please Note: Studio Artist 5 has many more vector paint styles and you can check out the presets and how they were built in the Paint Synthesizer. Look for any category that have Vector Paint in the title (ie Natural Media – Vector Paint.)
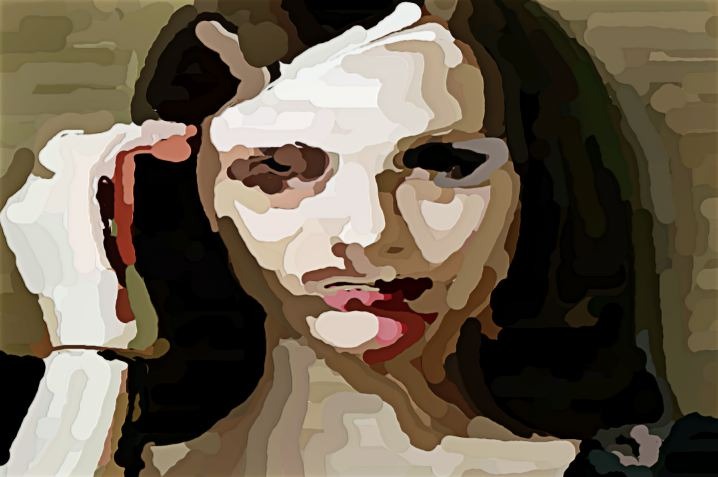
My goal for this painting was that I wanted to create a simple flat color vector paint style. I wanted the brush size to modulate in a way that would help define the source image features. I also wanted the entire canvas to fill in fairly quickly.
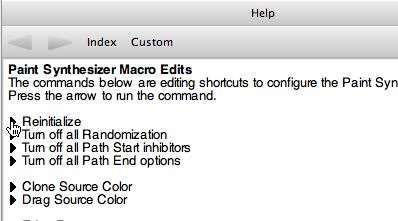
I started from ground zero by going to the Paint Synthesizer MacroEdit help page in the integrated help browser and clicking on the Reinitialize command link (2nd gallery image above). This resets the paint synthesizer to a default very simple paint style.
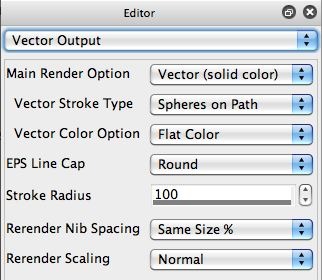
The default simple paint style is based on raster painting, so I first went to the Vector Output control panel and changed the Main Render Option from Raster to Vector (solid color). Now I had a paint preset that paints with vector paint rather than raster paint.
I also knew that I was going to want to have the brush size modulate along the length of a paint stroke. Some Vector Stroke Type options (like Bezier Path) don’t allow for this. So I switched the Vector Stroke Type to Spheres on Path (because I knew that this option did support brush size modulation). My Vector Output control panel settings are shown in the 3rd gallery image above.
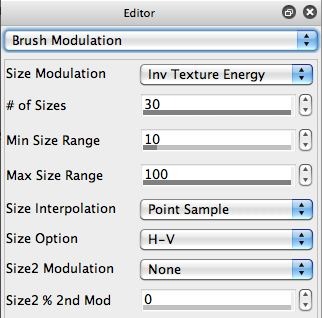
In yesterday’s post we discussed a brush size modulation strategy that uses Inverse Texture Energy to modulate the brush size (4th gallery image above). This approach is useful for generating detail in a painting, because the brush size is large in flat or slowly changing color gradient areas of the canvas, and small when painting at edge areas in the canvas.
I also mentioned that I wanted the canvas to completely fill in quickly. So, I needed to program the paint synthesizer appropriately to do this. One approach for normal raster paint preset is to work with the Blanking buffer, using it to keep track of areas of the canvas already painted and then not start new paint paths in those existing painted areas (as marked in the Blanking buffer).
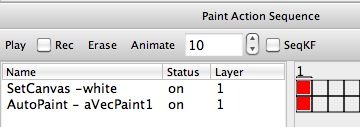
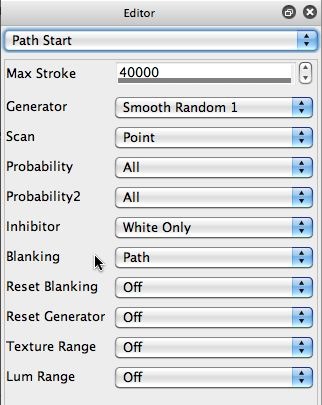
However, vector painting in version 4 currently does not support writing to the blanking buffer, so I had to come up with another approach. So I started with a fixed color white canvas, as seen in the first action step in my PASeq that erases to white. I then setup the Path Start control panel so that the Inhibitor parameter was set to White Only (5th gallery image above). What this means is that new paint paths will only start in white areas of the canvas (not in any areas of the canvas that are any other color).
By choosing this particular Inhibitor option, I need to start painting with a white canvas (or no painting will take place). So you need to be aware of what you are setting out to do, and the ramifications of the approach you are taking to achieve that goal, or you could get into trouble. Like if you started with a black canvas this paint preset as it’s edited would not do any painting, because it’s designed to only start paint strokes on white parts of the canvas.
By restricting path start locations to only be in areas of the canvas that have not been painted, running the single paint preset quickly fills in the entire canvas.
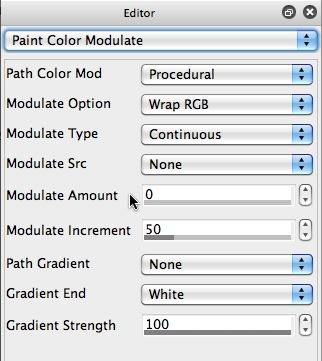
There’s one other editing change I made from the default macro edit Reinitilize settings that I started with. That default paint setting has a little bit of paint color modulation that takes place along the paint path. However, keeping this turned on leads to each individual vector sphere being a slightly different color, which is very noticeable and was not the particular flat color vector paint look I was going for. So I went to the Paint Color Modulate control panel (6th gallery image above) and turned the Modulate Amount parameter to 0 (so there’s no color modulation along the length of a paint path).
The PASeq preset I used to create this particular paint effect 72211.paseq Also please checkout all the Studio Artist 5.0 Vector Paint Presets in the Paint Synthesizer. Look for any category that have Vector Paint in the title ie Natural Media – Vector Paint.
Sometimes you may need to do a little minor hand paint touchup if there are a few small light spots on the canvas where you want better paint coverage. I did a small amount of hand touchup by tabbing spots of paint on these areas of the canvas. Those hand paint dabs are not included in the PASeq preset.
I also used the Image Compressor image operation effect to mildly adaptively boost the final paintings contrast. Again, that finishing step is not included in the PAseq preset.

