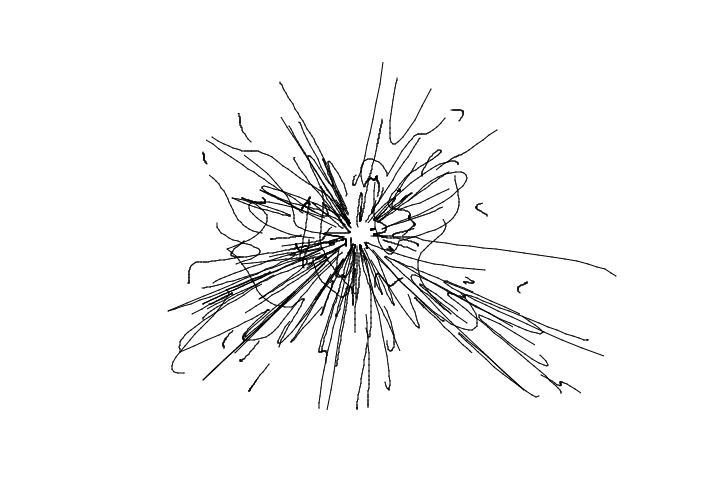
This post continues our discussion yesterday about working with Path menu commands to generate bezier paths for painting. In yesterday’s post we used a series of path menu commands in a PASeq to build a stylized woodcut block print paint effect. Today we will show how to take the stylized source image outline paths from yesterdays PASeq and keyframe animate the set of bezier paths over time to build a moving paint animation.
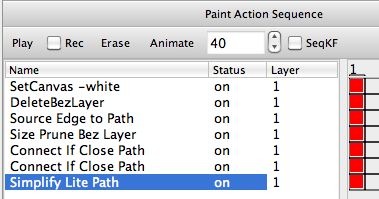
The paint action sequence in the first image below is from yesterday’s post, and is the part that builds a stylized edge rendition of the source image. The second image in the gallery below shows the set of bezier paths automatically generated by this PASeq.
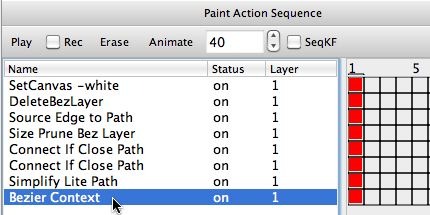
What we would like to to is encapsulate this stylized set of bezier paths into a single action step that can be used in a PASeq. To do this, we can record a Bezier Context action step.
A Bezier Context action step stores a set of bezier paths. Whatever bezier paths are in the current bezier path frame are duplicated and copied into the Bezier Context action step when it is initially generated.
Once we have encapsulated a set of bezier paths in a Bezier Context action step, we can then edit the shape and position of the individual paths and record the changes as additional keyframes for the action step. Studio Artist will automatically interpolate the individual curves between the recorded keyframe positions for intermediate frame times between 2 recorded keyframes.
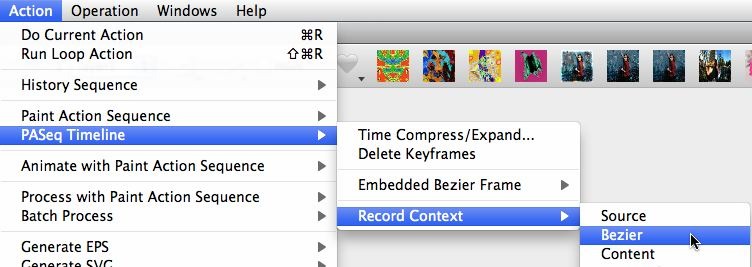
The third image above shows the Action : PASeq Timeline : Context : Bezier menu command being run, which then recorded the contents of the current bezier path frame into the highlighted Bezier Context action step shown in gallery image 4.
Once the bezier context is recorded, I then removed all of the initial action steps I first used to generate the stylized source edge rendition. The new PASeq is shown in gallery image 5. I moved to keyframe 40, and then option clicked the keyframe at frame time 40 for the bezier context action step. I did this because I wanted to generate an animation that ended up painting in the stylized edge source rendition initially recorded in the bezier context as the last frame in the animation.
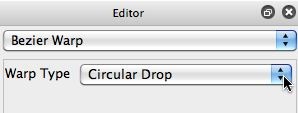
I then needed to modify the bezier curves (still available in the current bezier path frame) so that they were positioned differently to be used for the starting keyframe of my bezier animation. I could have manually edited the individual curves while in Bezier Edit operation mode. But instead, I used the interactive Bezier Warp to interactive warp the set of curves with a Circular Drop Warp Type (gallery image 6). After using the mouse to warp the bezier curves (shown in gallery image 7) I then option clicked keyframe 1 for the bezier context action step (gallery image 8).
I now had start and end position keyframes that specify the bezier paths for a 40 frame animation. I then turned on PASeq recording and used the Path : Paint Paths : Full Layer menu command to paint in the paths with the same vector paint synthesizer preset I used for yesterday’s post.
I tried 2 different PASeq variations to build 2 different looking paint animations. The 2 PASeq’s I used for the 2 different animations are shown below. The keyframed bezier paths used in both animations are identical.
The 2 paint animations generated from the keyframed bezier paths are shown back to back in the video posted here. Note that the first PASeq erases the canvas to white for each frame in the animation, so you can see the individual paint strokes move from frame to frame as they interpolate from their initial starting positions generated by the interactive bezier warp to their final positions as the stylized source edge sketch.
For the second animation PASeq, I only erased the canvas to white for the first frame (the second black keyframe at frame position 2 is a mute keyframe). The previous canvas image is then slightly feathered with the Geodesic Recursive growth image operation, and then overdrawn with the interpolating bezier paint strokes. So the previous painted strokes soften and feather out over time while new paint is drawn on top of them as the animation progresses. This second PASeq was used to build the generative paint style shown at the top of this post (which was the last frame of the second animation).
For More Information
This example generates a very simple paint animation, based on 2 sets of bezier keyframes that define the starting and ending positions for the individual paint paths in the animation. But you could record as many intermediate keyframes as you wished if you wanted to generate more complicated paint path movement. You could also use multiple Bezier Context action steps to build more complicated movement of multiple objects. Different paint presets could be used to paint in different sets of animating bezier paths stored in multiple bezier context action steps.
Several tips and tutorials on working with bezier paths are available here.


