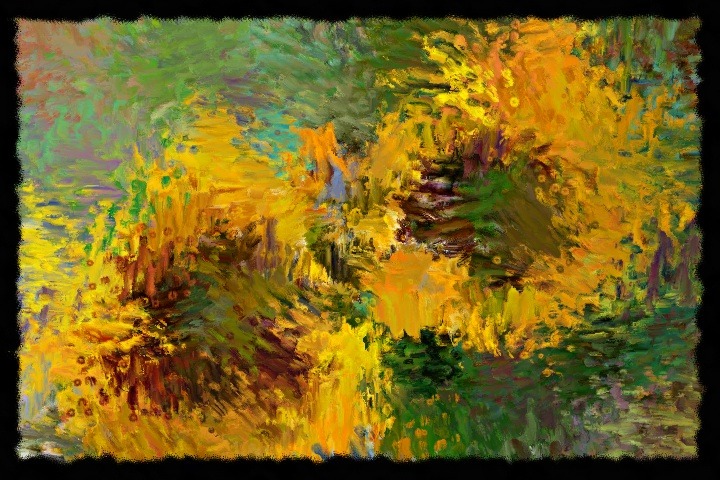
Working with painted border effects is a fun way to add some additional finishing touches to a digital painting. Studio Artist has a number of features that make it easy to build custom paint effects that paint in a solid color or effected border. There are also some factory Borders paint presets to help you get started. This post will dive into some paint synthesizer programing options for creating border effects,and will detail how the painted image above was generated.
Please Note: There are a number of Border presets in Image Operations > Frames and Borders and in The Paint Synthesizer > Borders and Frames
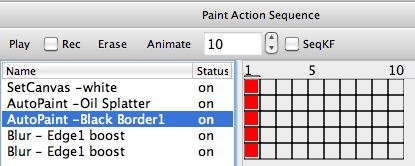
The paint action sequence (PASeq) below was used to create the painted image above that includes a black border effect.
There were 2 different AutoPaint presets used to create the final image. The first was a new factory paint preset called Oily Splatter, which was used to create the splatery loose oil painting effect from a sunflower source image.
The second AutoPaint action step was based on a Black Border1 paint preset. It’s one of the factory Borders paint presets we provide to show off some approaches to building paint effects that only paint in the borders of a canvas. I used a black painted border for this example, but you could choose any coloring you wanted, or you could build border from treatments like painting with water to soften or diffuse the border edges, or distress effects that lighten, feather ,or otherwise process the existing painted canvas at the border edges for artistic effect.
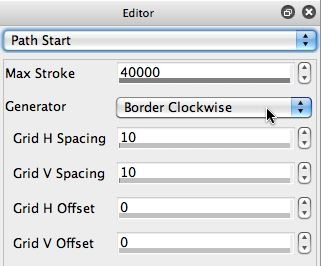
The paint synthesizer Path Start control panel snap below shows that the Black Border1 paint preset is using a Border Clockwise option for the path start Generator parameter. This path start generator will work it’s way clockwise around the canvas border starting from the top left corner. The horizontal (H) and vertical (V) grid spacing determines the horizontal and vertical spacing between adjacent start points during the clockwise border scan.
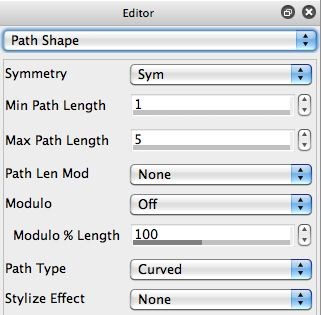
I used a 64 pixel brush size, so a grid spacing of 10 pixels with that larger source brush size insures that there will be complete coverage of the entire canvas border. The Path Shape control panel snap in the gallery above shows that we’re using a small path length of 5 pixels, so we’re really just laying down a series of painted brush nibs along the canvas border.
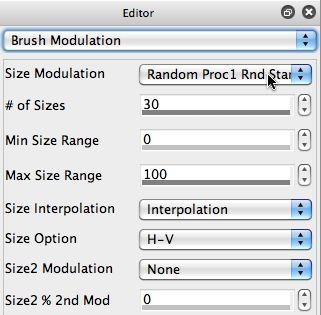
The Brush Modulation control panel is randomizing the applied brush size, which give the irregular painted border effect this preset generates. Turning this off would lead to a more regular painted border without variable source brush edge texturing this preset generates. The source brush itself also has a randomized irregular splatter shape that also contributes to the painted border texturing.
The Random Border path start generator is another path start option that is useful for creating painted border effects. It chooses random locations along the canvas border to start paint strokes, so the kind of painted borders it generates is visually different than pulling a series of paint strokes contiguously along the complete border in one pass, which is what the Border Clockwise generator does.

