We’ve previously discussed how to program the paint synthesizer to generate grid tiling paint presets, and how to hand paint 50% size reduced grid tiling movie brush presets to hand paint additional detail in a photo mosaic that properly nests the tiled sub blocks.
But sometimes you might not want to put in all that effort to hand paint in the additional detail. This post will discuss an automatic approach you can use that automatically builds a tiled selection mask based on source edge features. By running repeated cycles of auto-building a tiled selection mask at 100% brush size for the cycle and then using that auto-generated tiled mask to mask the auto-painting of a 50% size reduced movie brush photo mosaic preset, you can build a PASeq that will automatically generate a sub-block nested photo mosaic effect without doing any manual drawing to add additional smaller tile block detail.
The paint action sequence (PASeq) below shows off the cyclical process we discussed above for 3 different movie brush sizes (100%, 50%, and 25%). You could of course build a PASeq that worked with more levels for additional sub nesting and more source feature detail with smaller tile block sizes if you wanted to.
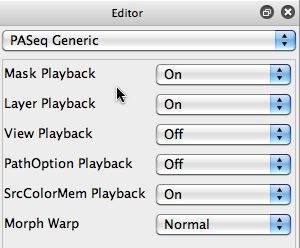
Since we’re working with multiple layers as well as canvas masking, we want to make sure that the Mask Playback and Layer Playback parameters in the Editor for the PASeq are both turned On (2nd gallery image above).
We’re working with 2 different canvas layers, but we want to output only Layer 2. So we want to make sure our Canvas Current View mode is set to View Current to do this. This means that the current layer is the only layer displayed in the canvas (the others remain hidden). As opposed to the view being generated from the entire layer stack with compositing and transparency settings (like you would get if you used the View All setting for the Canvas Current View). For more information on Studio Artist 4 layers check out this tip.
Layer 2 will be used to build up the photo mosaic output image with nested sub-block details. Layer 1 will be used to build a series of tiled selection masks, to restrict the auto-painting of our 50% size reduced additional photo mosaic auto-paint passes so that the smaller photo mosaic tiles only paint on progressively tighter source edge feature areas of the canvas. So we’re using the automatic tiled selection mask to simulate the effect of hand painting in additional smaller photo mosaic details we discussed in the previous post on building nested sub block photo mosaics.
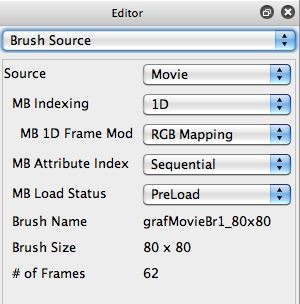
For this example I used a graffiti movie brush paint preset for generating the photo mosaic tiled painting (4th gallery image above). You should refer to our previous post on generating grid tiling paint presets for the details of how this particular paint preset is built in the paint synthesizer. I’m also using the Image Processing Brush Load functionality of the paint synthesizer to re-colorize my movie brush, as described in this previous post.
To automatically generate tiled selection masks, I made a few simple hand edits to the movie brush photo mosaic preset. I first edited the Brush Source control panel so the Source parameter was set to Computational as opposed to Movie Brush. I then set the Comp Brush parameter to Rect. I did this so that my source brush was a solid black rectangle. I also made sure the Horizontal and Vertical Sizes were the same as my original movie brush, (80×80) pixels for this particular example.
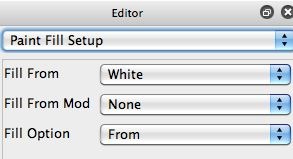
I then went to the Paint Fill Setup control panel and set the Fill From parameter to White. I did this because I will generate my automatic tiled selection masks based on painting white tile blocks (full selection) onto a black background (full mask) in layer 1. So for each cycle, I first erase Layer 1 to black and then auto-paint my white tile blocks to auto-paint a selection mask.
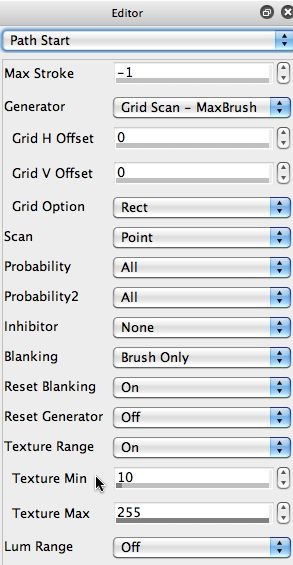
I then went to the Path Start control panel, and turned On the Texture Range parameter. I started with a Texture Min setting of 10. For each 50% reduced tile size cycle you want to increase the Texture Min setting. Doing so tightens the source edge features that will be painted in by the tiling preset for that cycle. So as the size reduction cycles continue, you generate smaller tiles for the selection mask that better reproduce increasingly finer edge detail in the source image. So the Texture Range parameters in the Path Start control panel are being used to insure that our auto-painted tiled selection mask is a mask that selects for source edge features.
Each layer has it’s own selection mask, so I used the Fixed Image ip op to route Layer 1 to the selection buffer for Layer 2. As opposed to using the Canvas : Selection : Set to : Canvas menu command, which would set the selection buffer associated with layer 1 to the painted selection mask in Layer 1. The Fixed Image ip op is a useful tool for routing images between different layers and/or their associated selection masks.
So the PASeq above starts with painting in the photo mosaic at 100% tile block size into Layer 2. I then generate a tiled selection mask in Layer 1 at 100% using a Path Start Texture Min setting of 10%. I then use the Fixed Image ip op to route the auto-generated tiled black and white selection mask of the source edge features from Layer 1 to the selection buffer for Layer 2.
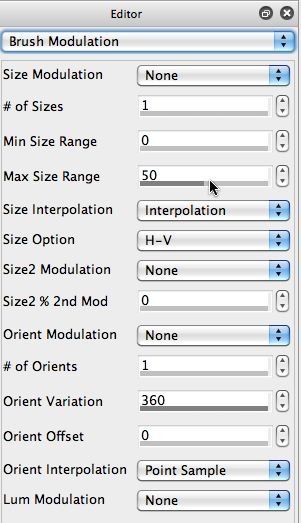
I then turned on Masking (4th gallery image above) for Layer 2, set the Brush Modulation control panel Max Size Range to 50% (5th gallery image above), and auto-painted in a 50% size reduced photo mosaic tiling using my graffiti movie brush paint preset. Since I had Masking turned on, painting only occurs in the white areas of my auto-generated selection mask.
I then continued the cycle for another 50% size reduction to add additional finer source feature detail. As mentioned above, you could continue the 50% size reduction for as many cycles as needed to generate your finished adaptive tile size photo mosaic effect.
Insuring Full Sub-Block Nesting
If you want to insure that each cycle does not introduce any additional partial smaller tile blocks into larger ones (what we’re calling full sub-nesting), then there’s one additional step you want to add to the original PASeq described above. I saved this additional detail so that you could first understand the basic idea of building a tiled edge feature mask in one layer and then using it to mask painting of a 50% reduced tile size photo mosaic to automatically build detail.
The extra step is that when we generate our successive 50% tile size reduced selection masks, we want to insure we also mask their painting with the previous generated selection mask. This additional step will insure that we never partially cover a larger tile block with smaller tile blocks. So what we mean by full sub-nesting is that if we cover any given tile block with a smaller tile we make sure we completely cover the larger tile with the smaller tiles.
The paint action sequence below shows off the complete series of action steps required to insure full sub-nesting for each 50% tile size reduced cycle.
Note that I insured full sub nesting by masking my 2nd auto-painted tiled selection mask with my first 100% tiled selection mask. So after I auto-paint a tiled selection mask, I used the Canvas : Selection : Set to : Canvas menu command to set the selection buffer for Layer 1 to the auto-painted tiled selection mask generated in Layer 1 (the Canvas to Region action steps in the PASeq). I then turn on Masking for the remaining action steps that auto-paint tiled selection masks (as shown in the 2nd gallery image above).
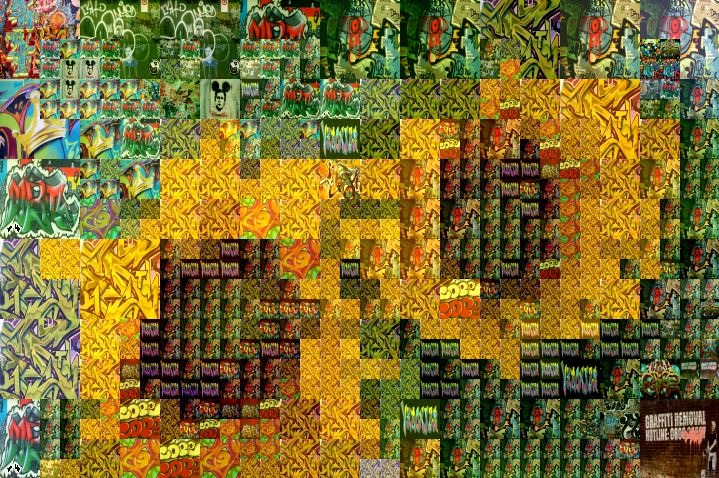
The first photo mosaic image in the very top gallery shows off full sub-block nesting based on the second PASeq. The second photo mosaic image in the very top gallery was generated with the first example PASeq above. You can see that there’s some partial coverage of larger tile blocks by smaller ones in the second photo mosaic example (so it’s not full sub nested).
In conclusion, we’ve shown how to automatically generate full sub-block nested photo mosaic images using a movie brush. We built a PASeq that automatically generates tiled selection masks of increasingly tighter source edge features, and then uses those auto-generated selection masks to mask auto-painting of 50% size reduced photo mosaic tilings. By repeating the number of cycles, you can build additional detail with a series of 50% size reduced photo mosaic tile blocks.





I wanted to point out that you could build the tiled selection mask paint steps using the movie brush source, if you had a movie brush with an embedded alpha channel set to full on. You would then use the Source Alpha Brush option for the Brush Type, as opposed to using a rectangular computational brush source like i did in the example above. The advantage of using the same movie brush for all of the paint steps (mosaic painting and selection tiling) is that then the source brush sizing for the selection painting would be directly tied to the movie brush sizing.There’s an additional followup post to this one coming in a few days that discusses how to edit the PASeq to use a different movie brush. The way we built the PASeq above, you then have to manually edit the individual tiled selection paint action steps and adjust their source brush sizing to match the new movie brush. If the entire PASeq just used the same movie brush, then all you’d have to do is load a new movie brush into each of the autopaint action steps with no manual brush size parameter adjustments.