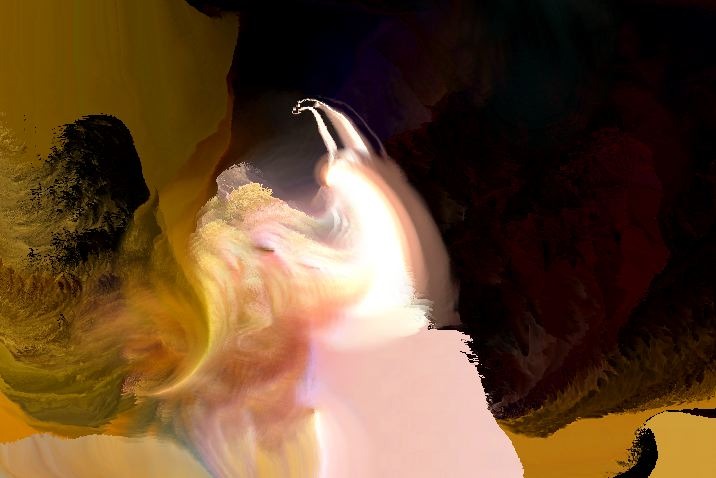
The image below is a frame capture from an abstract generative paint animation. The animation is based on the movement of time particles over the course of the animation. The paint time particles are part of a more complicated DualMode Paint preset that also incorporates locally adaptive displacement modulation. The water wash paint preset discussed in yesterday’s Face Melt post is also used to create the dissipative wash effect seen in the animation.
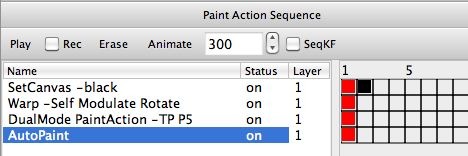
The paint action sequence (PASeq) shown below was used to create the generative animation for this example.
Note that the first Set Canvas – Black action step is muted after keyframe 1 (a black keyframe is a mute keyframe), so it’s only applied to the first frame of the animation.
The 3rd action step is the most important one in the PASeq. This is the step that actually applies paint to the canvas, and generates the movement that occurs over time. The 2nd and 4th action steps are really about creating dissipative effects, as opposed to generating any paint or paint movement over time.
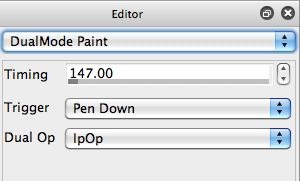
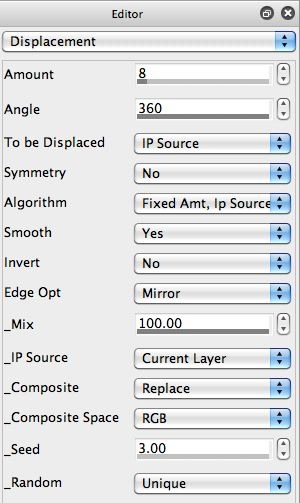
The third action step is based on a DualMode Paint effect, as can be seen in the 2nd gallery image above. The Dual Op for the DualMode Paint effect is based on an image operation effect. The ip op effect used for the Dual Op is the Displacement effect, whose control panel settings can be seen in the 3rd gallery image above.
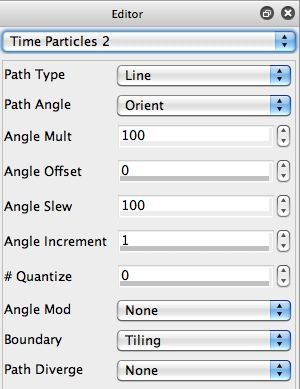
The paint synthesizer part of the DualMode Paint preset used in the 3rd PASeq action step is based on paint synthesizer Time Particle behavior. Time particles are a feature of the paint synthesizer that allow individual paint stokes to have continuity and associated movement over time in an animation. The first 2 gallery images below show the Time Particle control panel settings for the paint synthesizer part of the DualMode Paint effect used in this animation.
The 3rd gallery image above shows the very first frame of the animation, and gives you a good idea of what the individual paint strokes associated with the time particles look like. Note that the individual time particle paint strokes look like curved soft luminescent cones.
If you look at the 2 Time Particle control panels above you will see that the movement behavior of the time particles at the boundary of the canvas is set to Tile, and the movement over time is set to follow straight line paths based on the source image orientation. This is about as simple as you can get with time particles, you could program much more complicated behavior based on flocking or pen follow/repulse, bouncing at borders, etc.
The gallery images below give some more insight into how the particular shape and luminescent quality of the painting time particles are programmed. The first gallery image shows the Path Start control panel. Note that the Max Stroke control is set to 20, so there are 20 time particles being used in the animation. Remember, time particles are really associated with path start points having continuity and movement over time.
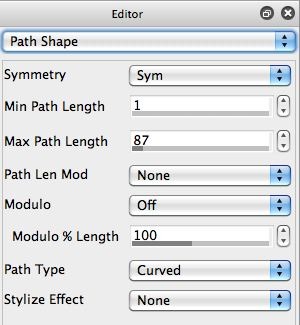
The 2nd gallery image above shows the Path Shape control panel. Note that the max path length is set to 87 pixels, and the Path Type is set to be a Curved path.
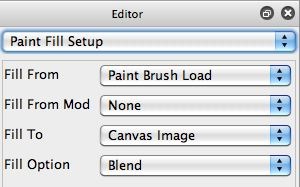
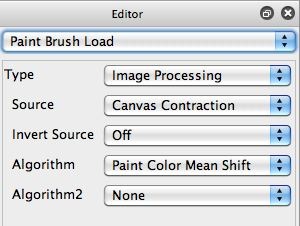
The 3rd gallery image above shows the Paint Fill Setup control panel. Note that the Fill From parameter is set to the Paint Brush Load option. If we look at the 4th gallery image above (the Paint Brush Load control panel), we can see that an Image Processing Brush Load is being used for the interior fill of the paint nib. The Source for the image processing is the Canvas Contraction option, which is useful for generating a self-similarity fractal effect since it applies a reduction scaling warp effect to the canvas being loaded as the Source for the image processing.
The Algorithm is set to Paint Color Mean Shift, so the contracted canvas image is color shifted to match the associated source image area. The settings used for the interior fill of the paint nib, recolorizing a contracted canvas patch via the Brush Load settings, is what leads to the luminescent quality of the paint, with the fractal complexity associated at the edges of the drifting paint time particle shapes.
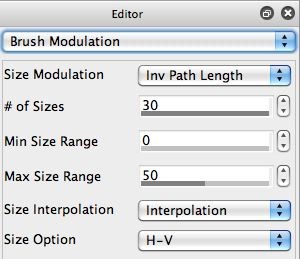
The 5th gallery image above shows the Brush Modulation control panel. Note that the Size Modulation is set to the Inv Path Length option. modulating the brush size based on the path length is what generates the Cone shape of the overall brush stroke associated with the drifting time particle.
To Generate the movie use: Action : Animate with Paint Action Sequence : to Movie menu command.
Note that the 2nd and 4th action steps along with the displacement ip op associated with the Dual Mode Paint effect are what is generating the dissipative trailing cloud effects drawn off of the moving time curved cone shaped particles.




1 Comment