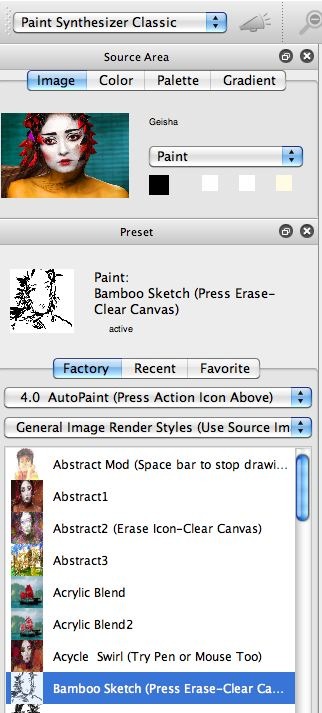
The gallery images above show off some of the Editor control panels for the Bamboo Sketch paint preset. The paint synthesizer has over 500 editable controls, so getting a handle on how every individual control works can take some time. This particular paint preset has some interesting individual characteristics, so we’ll take a look at specific control panel settings that help give the preset it’s unique individual sketch look.
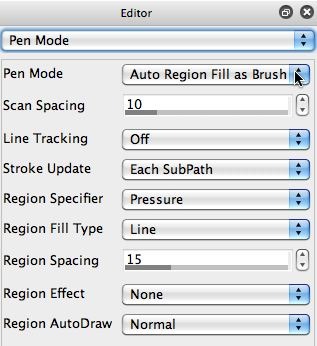
The 2nd gallery image above shows the Pen Mode control panel. Note that the Pen Mode parameter is set to use the Auto Region Fill as Brush setting. The 2 Region Fill as Brush pen modes bypass the normal Brush Source controls and use the paint path to generate a single region shape that is then used as the Brush Source for painting.
So this pen mode builds a path that is then used to generate a region shape and that single region shape is filled in like it was a single brush nib. Note that this is very different than the normal paint synthesizer drawing model where a series of individual paint nibs based on the brush source are applied along the path to build up a paint stroke.
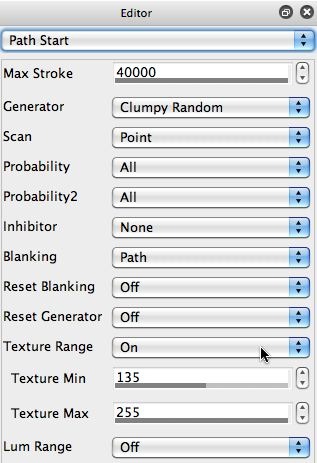
The 3rd gallery image above shows the Path Start control panel. The parameters in this control panel determine where the individual paint strokes start drawing on the canvas. Note that the Texture Range control is turned On. This means that paint paths will only start when they fall on areas of the canvas that correspond to areas of the source image with high texture values (between 135 and 255 as shown in the associated Texture Min and Max controls). So paint strokes will only start drawing on areas of the canvas associated with edges of the source image. This setting is what helps to give this paint preset its intelligent sketching behavior.
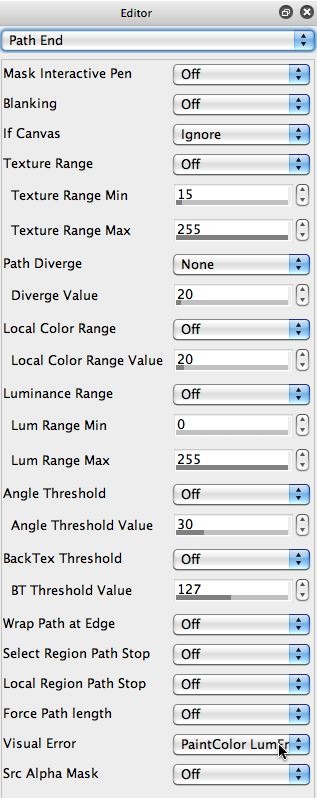
The other part of the intelligent sketching behavior is controlled by the Visual Error control in the Path End control panel ( as shown in the 5th gallery image above). Note that the Visual Error control is set to PaintColor LumErr. The path end controls determine when individual paint paths will stop drawing. This Visual Error setting turns on an intelligent module that is always looking at the source image and the associated canvas area, and turns off paint stroke drawing if it feels that continued drawing will lead to a worse reproduction of the source image.
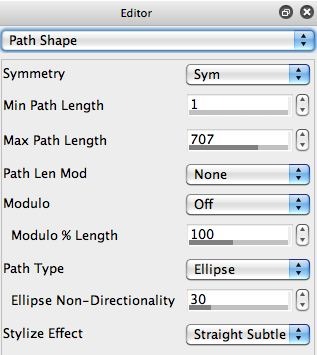
As we mentioned above, the automatic path drawing is going to determine the shape of the regions being drawn by this paint preset (since it’s using Auto Region Fill as Brush pen mode). The 4th gallery image above shows the Path Shape control panel, whose parameters determine the shape of the auto-drawing paint paths. Note that an Ellipse setting is used for the Path Type parameter (with a fairly large Max Path Length). And a Straight Subtle setting is used for the Stylize Effect parameter. These settings work to define the curvature associated with the individual bamboo region shapes that are drawn by this paint preset.
The shapes themselves are drawn with vector paint (as opposed to raster paint). Studio Artist’s paint synthesizer was originally designed to draw raster paint onto vector paint paths. However, version 4 provides several different techniques that can be used to paint with vector paint rather than raster paint. Since we’re using Auto Region Fill as Brush pen mode, the region shape being drawn is filled as a vector shape for this particular paint preset.
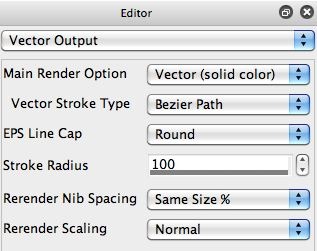
The 6th gallery image above shows the Vector Output control panel. Note that the Main Render Option is set to Vector (solid color) as opposed to the normal Raster option. So, the normal raster paint engine used by most paint synthesizer presets is circumvented and a special vector fill algorithm based on filling the Bezier Path is used instead. This Vector setting for the Main Render Option overrides the normal Brush Type control settings, which are ignored when using the Vector options available here.
If you switch the Main Render Option parameter back to Raster, then the existing Brush Type control panel settings will now be used to fill in the auto-drawn regions. Thy this out and see what happens.
For More Information
I hope the above exploration of some of the paint synthesizer control panel settings for the Bamboo Sketch paint preset helps give you an idea about how to start to examine any individual paint preset in the Editor to see how it’s individual control settings give it it’s unique drawing behavior and appearance.
For more information on working with vector drawing in the paint synthesizer check out this tip.
For more information on controlling where automatic paint strokes are drawn when programming a paint preset, check out this tip.
For an introduction to the paint synthesizer (including the different pen modes) check out this tip.


