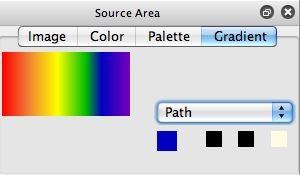
There was a question asked recently on the user forum concerning building up a simple color gradient like the one shown above in the Source Area. This post will look at this task in detail, explaining why you are better off using a manual approach as opposed to an automatic one for this kind of color gradient construction.
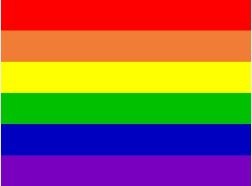
The original user forum discussion had to do with what happens when you try to use the Edit : Color Gradient : Generate from : Source Image menu command to automatically generate a color gradient from a simple source image composed of color bars shown below.
The original question was related to generating color gradients derived from the source image. For this post example I drag and dropped the original color bar test image from the mac finder into the canvas and worked with generating the color gradient from the canvas image, but the concepts we will be discussing are the same independent with where the coloring is coming from.
The automatic algorithm Studio Artist currently uses to analyze coloring for automatic color gradient generation from a source or canvas image is based on the code used for the Source Color Palette auto-generation. The Source Color Palette is artificially constrained in Studio Artist to use 48 different colors in it’s palette. Ideally you should be able to select this number of palette colors, but that feature is not currently available in Studio Artist. So, if you run an algorithm that tries to automatically generate a color palette from an image, the algorithm assumes it needs to find 48 different colors. If the algorithm can’t find 48 different colors, the remaining color slots in the palette are set to black by default.
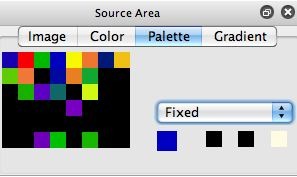
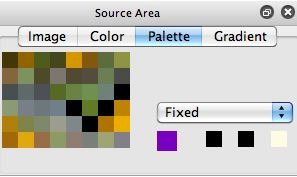
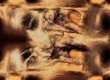
The 2nd gallery image above shows the color palette auto-generated from the color bar image I placed in the canvas to derive coloring from. I used the Edit : Color Palette : Generate from : Canvas Image menu command to generate it. Note that the algorithm is picking up the color transitions at the edges between the color bars (where the colors somewhat mix) in addition to the main bar colors, and there are lots of black palette squares where no color was found. There are various Edit menus you can use to reorder or sort a color palette or color gradient.
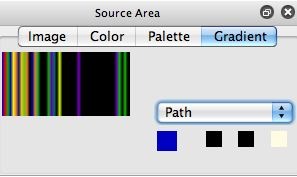
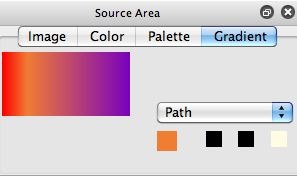
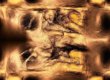
The Edit : Color Gradient : Generate from : Canvas Image menu command uses the same automatic color palette generation algorithm to build an automatic color gradient, again with the assumption that it needs to find 48 different colors. The end result is shown in the 3rd gallery image above. Note the similarity to the auto-derived color palette.
Of course, for this artificial color bar image the automatic analysis results and associated automatically generated color gradient are really less than optimal. Ideally you’d like the palette generation algorithm to assume only 6 colors are available to be filled in the generated output palette or gradient.
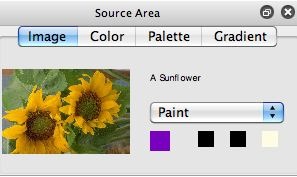
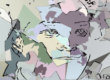
The particular automatic palette analysis algorithm we use was really designed to analyze real world imagery that contains a wide spectrum of different colorings. The 4th and 5th gallery images above show off a real-world sunflower source image and the resulting automatically generated color palette.
The 48 different colors in a color palette constraint works really well for the original intended uses of the Source Color Palette, either as a set of editable color memories to use when painting, or as a color analysis of a real world image that is useful for re-colorizing an entire canvas image to match the real color appearance properties of some particular photo or painting you like (using something like the Color Palette map ip op). David Kaplan used this particular color re-mapping feature based on cloning a painted canvas to match a different image’s color palette to great artistic effect in his Studio Artist animated feature length file ‘ Year of the Fish”.
Hand Building a Color Gradient
If your end goal is to generate a simple color gradient that only has a few different colors in it, you are much better off just building it by hand. You can use the c hotkey option for the cursor to select any color in a source or canvas image in Studio Artist as the current source color (you hold down the c key and then click the cursor on the color you want to capture as the current source color). You can then option click anywhere inside of the Color Gradient preview in the Source Area to record a new color index into the color gradient.
To erase an existing color in the source color gradient, you hold down the option and command keys and then click on the color you want to remove. Color Gradients require a beginning and ending color at the left and right sides of the color gradient. If you option click on the absolute left or right side of the source color gradient then you will replace the existing color at the endpoint with the new current source color you have selected. So it’s best to start by recording your desired endpoint colors for your custom color gradient, and then option click to add your additional interior colors.
The gallery above shows off the hand editing individual steps I used to build up my color gradient composed of 6 colors taken from the original color bar photo shown earlier in the post. I held down the c key and clicked the colors in each of the individual color bars one by one to build up my custom color gradient.
I started with the first and last color bars and option clicked those 2 colors at the left and right sides of the source color gradient. I then c clicked to select the remaining 4 colors, and option clicked at the appropriate spatial positions in the source color gradient to equally space them out across the custom color gradient I was building up by hand.
After you option click the source color gradient to add a new color, you can move the cursor vertically to adjust the gradient transition mix between the color index you are adding and the next one. Once you release the cursor, then the new color index and it’s transition mix settings are recorded. You can always use the Edit : Undo menu if you make a mistake and want to try again. Also, you can use the h, s, and l mouse modifier hotkeys to mouse down in the color gradient and interactively adjust the hue, saturation, and luminance of the complete color gradient. The I hotkey lets you shift all the color index positions to the left or right, the b hotkey lets you adjust the b clicked color index’s transition mix, and the a hotkey lets you add a new color interactively (based on your mouse movement after b clicking).
Once you have build a custom color gradient (or color palette), you can use the appropriate File : Export menu options to save your color gradient or color palette (and restore them at a later date if necessary). You can also drag and drop color gradient or color palette files onto the Studio Artist icon to import them. There are also context menus available by control clicking on the color gradient (right click on windows) that let you import or export (and also move color gradients or color palettes back and forth between the source area and the MSG Advanced Editor if you run the context menus in the MSG Advanced Editor).