The real power of Studio Artist is that it’s an extremely user configurable environment for building custom visual effects. In today’s post, we’ll take a look at using the paint synthesizer to build smart halftone screens, which can then be used in a PASeq to build custom halftone screening effects.
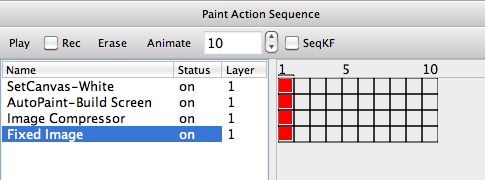
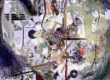
The paint action sequence (PASeq) below was used to create the smart screening effect shown below.
The second AutoPaint action step is using the paint synthesizer to build a custom halftone screen in thecanvas. The halftone screen is smart, in that it’s build taking into account features of the source image (like local spatial orientation).
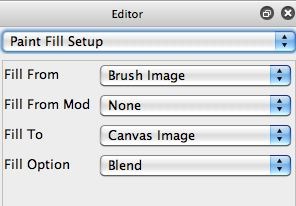
The image gallery below shows off how the paint synthesizer is configured to generate a custom halftone screen. Note that the Paint Fill Setup control panel is configured to paint using the Brush Image.
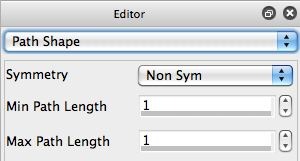
The 2nd image in the gallery above shows the Path Shape control panel. The thing to note is that the Max Path Length is set to 1, so when a paint path is drawn only a single paint nib will be placed on the canvas. As noted above, the paint nib will just be the source brush itself, with no additional coloring.
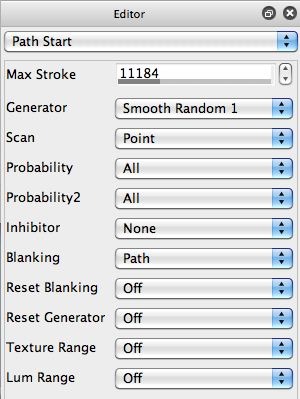
The 3rd gallery image above shows the Path Start control panel. Note that we’re using the Smooth Random option for the Generator parameter.
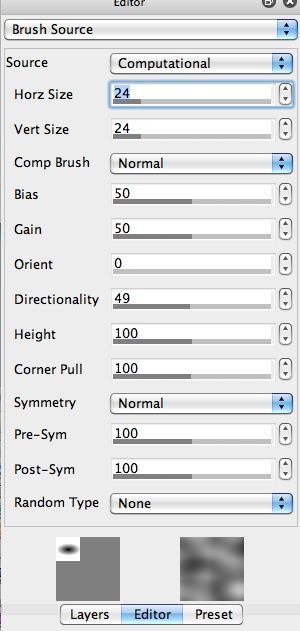
The 4th gallery image above shows the Brush Source control panel. Note that the Directionality control is set to 49 %, which generates an ellipse brush shape ( as opposed to the round circular brush shape a normal 0% setting would generate).
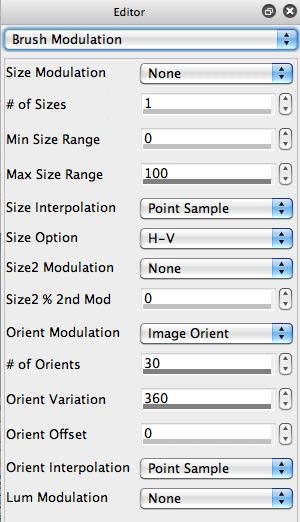
The 5th gallery image above shows the Brush Modulation control panel. Note that the brush size is not modulated, but the brush orientation is modulated by the source Image Orientation.
The 6th gallery image above shows the Paint Fill Apply control panel. This control panel determines how paint nibs are applied to the canvas. note that the Nib Masking control is set to the Local Image Range setting. This setting helps generate better edge definition from the final halftone output.
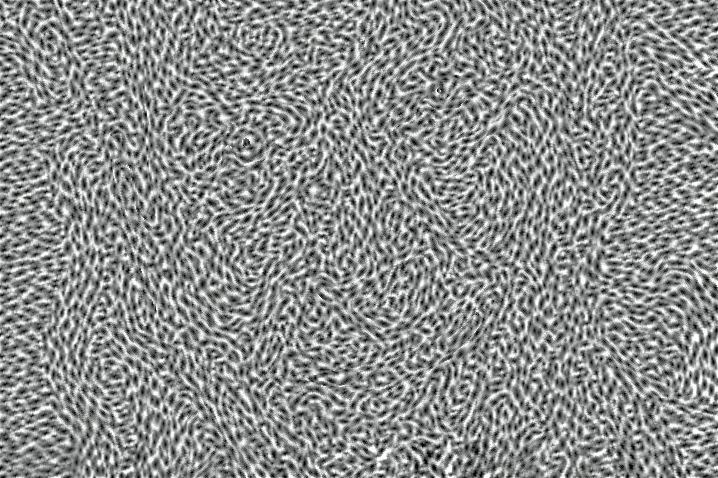
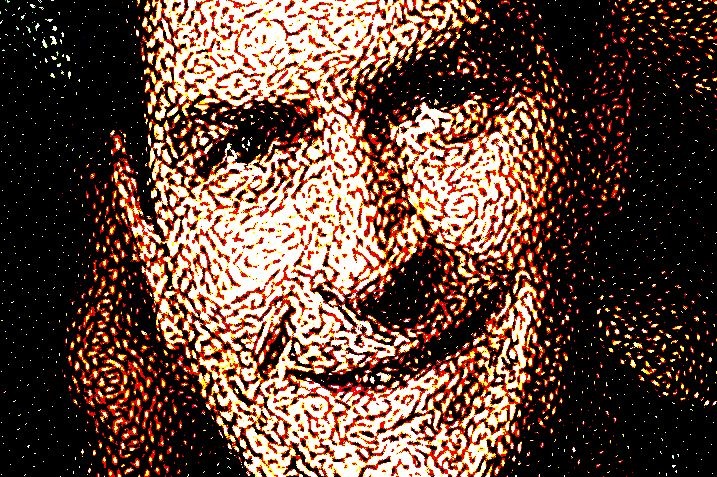
The halftone screen is being generated from the placement of individual brush nibs on the canvas. The ellipse shaped nibs are oriented to match the source orientation. And the individual halftone dots (the nibs) are Nib Masked, so this and the smart orientation is generating a form of adaptive screening. The halftone screen is generated to better represent details of the source image, which still being a random screen due to the particular path start Generator we are using. The 6th gallery image above shows what the finished smart halftone screen looks like.
If the path start Generator is switched to a Rectangular Grid Scan, then the halftone screen will be a normal regular grid (with elliptical partial dots that track the source orientation), as shown below.
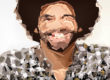
If the Source Brush is changed from an ellipse to a sphere (by setting the Directionality to 0 %), and the Nib Masking is turned off, then you would get a normal circular dot halftone screen (as shown in the 2nd gallery image above).
The 3rd action step in the PASeq is using the Image Compressor to help equalize the contrast of the smart screen generated in the canvas. Ideally, you want a halftone screen to have a flat local histogram, so we’re using this image processing effect to help achieve that after initially generating a smart screen in the canvas using the paint synthesizer.
The 4th action step in the PASeq is what halftone screens the Source image (using the halftone screen that is sitting int he canvas that was generated by the paint synthesizer). Note that we’re using the Fixed Image ip op with the Composite control set to the Threshold Effect with Canvas setting. The IP Source is set to the Source Image. So these 2 settings for the Fixed Image ip op thresholds the source image with the current contents of the canvas (the smart halftone screen built by the paint synthesizer).