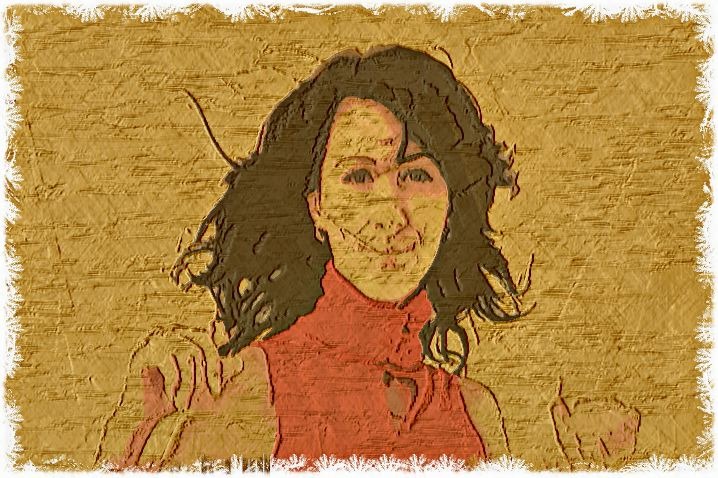
Two days ago we described how to build a stylized petroglyph effect that was drawn on synthesized brown paper. I thought it would be fun to run with the synthesized textured paper idea, and build a movie processing effect that rendered a source movie as a moving raised texture on a brown paper backing. This post will discuss how I put together the effect as well as how I worked to modify different processing steps to eliminate flicker in the rendered output movie.
The trick to eliminating flicker in paint animation or video processing effect is that you need to insure that there’s temporal continuity from frame to frame in the rendered animation. Anything that introduces variation between adjacent frames in the animation or video processing is going to introduce flicker. Obviously any movement in the video is going to result in differences in sequential frame images. But you want to try to avoid introducing wildly varying textures in your paint animation. Also see https://vimeo.com/38827730. This video talks about how to work with flicker and edit a PASeq
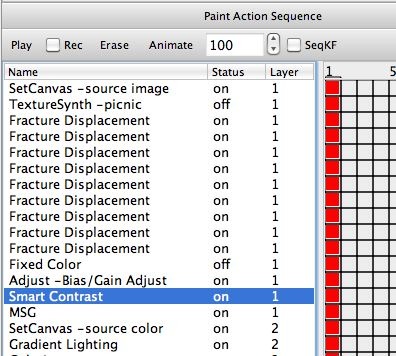
The screen shot below shows the beginning of the paint action sequence (PASeq) used to generate the stylized textured paper effect. The highlighted Smart Contrast action step is what introduces the source image features into the paper texture. Everything before that drawing into layer 1 is associated with building the paper texture.
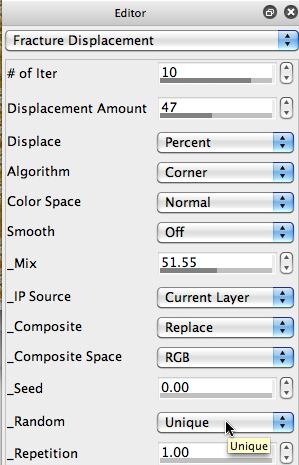
There are a series of individual Fracture Displacement ip op action steps that work in sequence to build up a rough texture field. The 2d image in the gallery above hows the Editor parameters for the Fracture Displacement ip op. Note that the Random parameter is set to Unique. What this means is that the effect uses a unique random number seed each time it runs, so the output of the effect is always different. This might be great for generating variety, but it’s going to introduce flicker into the rendered animation because the generated texture will be different for each frame.
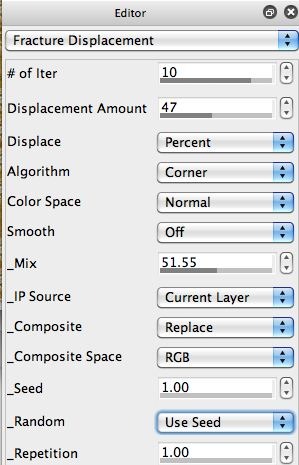
So the first thing I did was change the Random parameter to the Use Seed option for each of the Fracture Displacement action steps. I also edited the Seed parameter so that each of the Fracture Displacement action steps used a different random number seed. By making these 2 editing changes, each action step generates a unique series of fracture effects, but they are the same set of effects for each frame in the animation. So the texture being generated is consistent from frame to frame in the rendered animation.
If you look at the very beginning of the PASeq, you can see that the canvas is initially set to the source image, and then the Fracture Displacement action steps process that source image. Since the source image for movie processing will be different for each frame, that would also introduce variation in the resulting paper texture. So I turned off the first action step and turned on the 2nd Texture Synthesizer action step which generates a consistent checkerboard pattern.
Making the edits above lead to a rendered animation with reduced flicker. But it wasn’t totally eliminated. The AutoPaint action steps associated with painting the white fringe were also painting with different textures for each frame. So while the interior of the paper texture was not flickering, the edges of the canvas were still flickering.
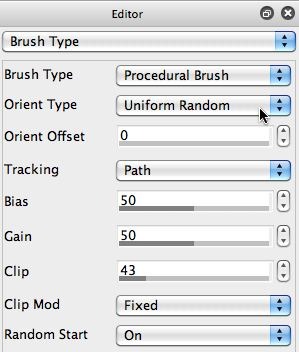
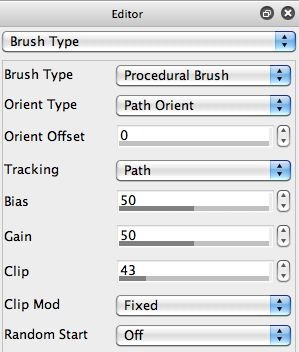
A look at the AutoPaint-Border paint preset and the Brush Type control panel shows that the Procedural Brush Type was being used. In order to make it draw consistently from frame to frame, I needed to switch the Orient Type parameter from the Uniform Random setting to the Path Orient setting. And I needed to turn Off the Random Start parameter. Both of the initial settings for these 2 adjustable parameters introduce unique textures every time a paint stroke is drawn, which is what was introducing flicker at the fringed edges of the synthesized paper.
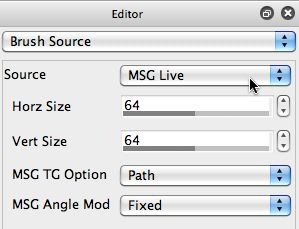
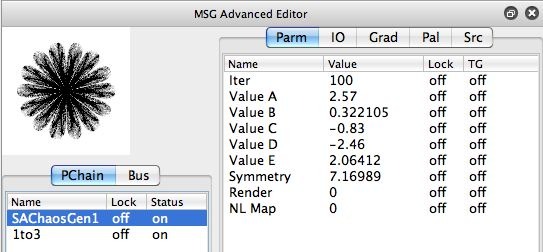
The other AutoPaint step that was painting the border was using a MSG Live Brush Source. The MSG TG Option was set to Path-random start. And the MSG preset being used for the source brush had 2 temporal generators (TG) attached to 2 different editable parameters. Because of this, the brush shape was always varying. This again introduced flicker into the painted white border for the paper texture. So I edited the MSG TG option and turned off the 2 Temporal Generators in the MSG preset.
The first 2 screen shots above show the original Brush Source control panel settings and the MSG preset parameter settings. The last 2 screen shots in the gallery show the modified settings I made to eliminate the textural variations in the paint preset, which eliminated flicker in the white painted border.
The original flickery moving paper texture rendition of the source movie is shown here. Note that the paper texture and the edges of the paper texture both flicker over time. The second movie with the flicker eliminated is shown here. Note that you still see the movement associated with the source video, but the flicker associated with the paper texture and borders in the first movie example is now gone.
Whether you like the visual aesthetic of flicker in your animation or not is really a personal artistic design decision. If you want to emulate the visual effect of an old time movie or hand drawn animation, then flicker might be just what you are looking for. If you want something very visually clean, then you probably don’t want flicker. Depending on how you build your PASeq for movie processing, you can add flicker into the resulting animation or work to eliminate it in the resulting animation.
Again, the key to lack of flicker is introducing temporal continuity into your animation. And to generate flicker, you want temporal variation from frame to frame in the animation.

