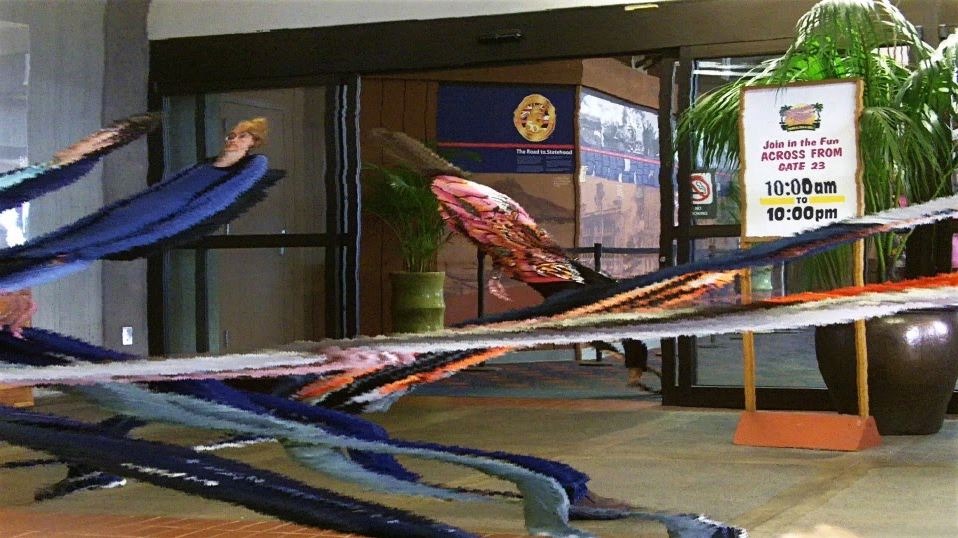
Studio Artist provides a number of different fully automatic Temporal Image Processing effects that can be adjusted to build a wide range of artistic slit scan effects that process a set of video frames into a static 2D image. These temporal effects include the Temporal Scan Tracker as well as the Temporal Slit Scan Complete effects. By changing the direction of the slit scan based on it’s relationship to movement occurring in the source video you can dramatically change the kind of artistic effect generated by the slit scan processing.
The slit scan example above was created with a static video camera view, and a vertical SlitScan tracking direction. The horizontal movement of individual people in the video sequence interacts with the vertical scan direction of the effect to create the ‘streamers’ in the resulting output image. Each streamer corresponds to an individual person moving through the video sequence used as the source movie for the slit scan effect. The progression of time in the video sequence is encapsulated into a single static 2D image.
For the next set of examples below I used a moving video camera shooting essentially static objects in a scene. The source video footage was taken with a Zodak Zi8 video camera out of the side window of a moving car. The video is shot out of the right side window of the car, which means the car can be thought of as moving from the right to the left as it moves through the real world beach scene. Because of this camera movement the individual objects in the scene appear to move from left to right in the individual video frames as the video sequentially progresses.
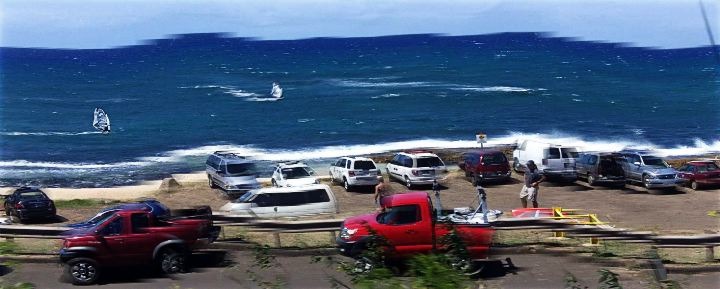
I used the Temporal Scan Tracker effect for the examples below, but the scan direction variations we are discussing in these examples would also apply to working with the Slit Scan Complete effect. The first example uses a right-left scan, which matches the movement of the car through the real world scene. This is equivalent to the SlitScan tracking the pan direction if the video shot was a stationary rotational pan. Matching the real world movement of the camera allows for the creation of a panorama image effect, as shown below.
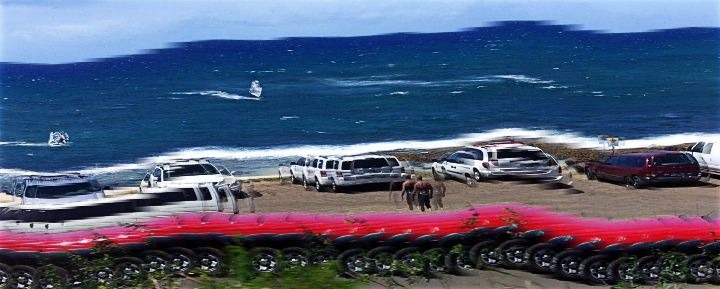
If I reverse the SlitScan direction to be left-right, then it is inverted (or 180 degrees offset) from the real world movement of the camera. However, this means that the scan direction is actually tracking the movement of individual objects in the video frames as they slide from left to right in sequential frames. In the example below I setup the frame timing of the scan tracker effect so that the SlitScan movement tracked the red truck as it moved from left to right across a few sequential frames in the source video.
Inverting the scan direction in this way created a very different visual effect than our first example. In this particular case i’m creating a time smear in the foreground, we see the truck smear in time across the entire image. Because the far away objects are much further in distance from the camera than the truck, the amount of smear reduces dramatically for the rest of the scene, which appears to just be slightly spatially stretched out.
Inverting the scan direction from a video pan or movement direction can also be used to re-conceptualize a real world scene. By adjusting the number of frames being processed and the index spacing between the frames and the coverage control you can radically change the aesthetic look of the resulting slit scan effect.
The next example shown below used a scan direction 90 degrees perpendicular from the video camera movement. I also increased the Frame Tracking to process more video frames. Note how this slit scan processed output is very different looking than the examples shown above.
All of the examples shown above were using the Linear Interpolation option. By changing that control setting you could create additional effect variations.
Hopefully you now have a better idea of how you can change the direction of a slit scan effect in relation to movement in a video sequence to radically change the resulting appearance of the final 2D slit scan effect output. Which settings you use will depend on your source video footage and what kind of effect you are trying to achieve.


